Connect firebase project with Routee Platform
Overview
The proposed solution aims to elevate the Routee platform by integrating Firebase Cloud Messaging (FCM), facilitating efficient and dependable push notification services for our customers. To enable this integration, customers will have the capability to upload a Firebase Service account JSON file via the Routee interface. This file contains essential credentials required for authenticating communication between Routee and Firebase. Once successfully uploaded, the JSON file will be securely associated with the user's Routee account, ensuring proper configuration of credentials for sending push notifications.
This comprehensive solution is designed to deliver a seamless and secure user experience by enabling straightforward Firebase integration while upholding high standards of security and data integrity in all data handling processes. By equipping our users with these capabilities, Routee aims to significantly enhance communication strategies through reliable push notification services.
Steps By Step Guide to Add Firebase Credentials to Routee
Here are few steps to add a Firebase credentials JSON to Routee:
Step 1: Access URL
Open a web browser and enter the following URL in the address bar:
https://go.routee.net/#/public/login

Step 2: Enter Email and Password to Login
Enter Email and Password in the designated fields and check the checkbox and confirm “You are not a Robot“. After that click on Login button. If your credentials matched and authorized, then you will be redirected to the Routee dashboard.
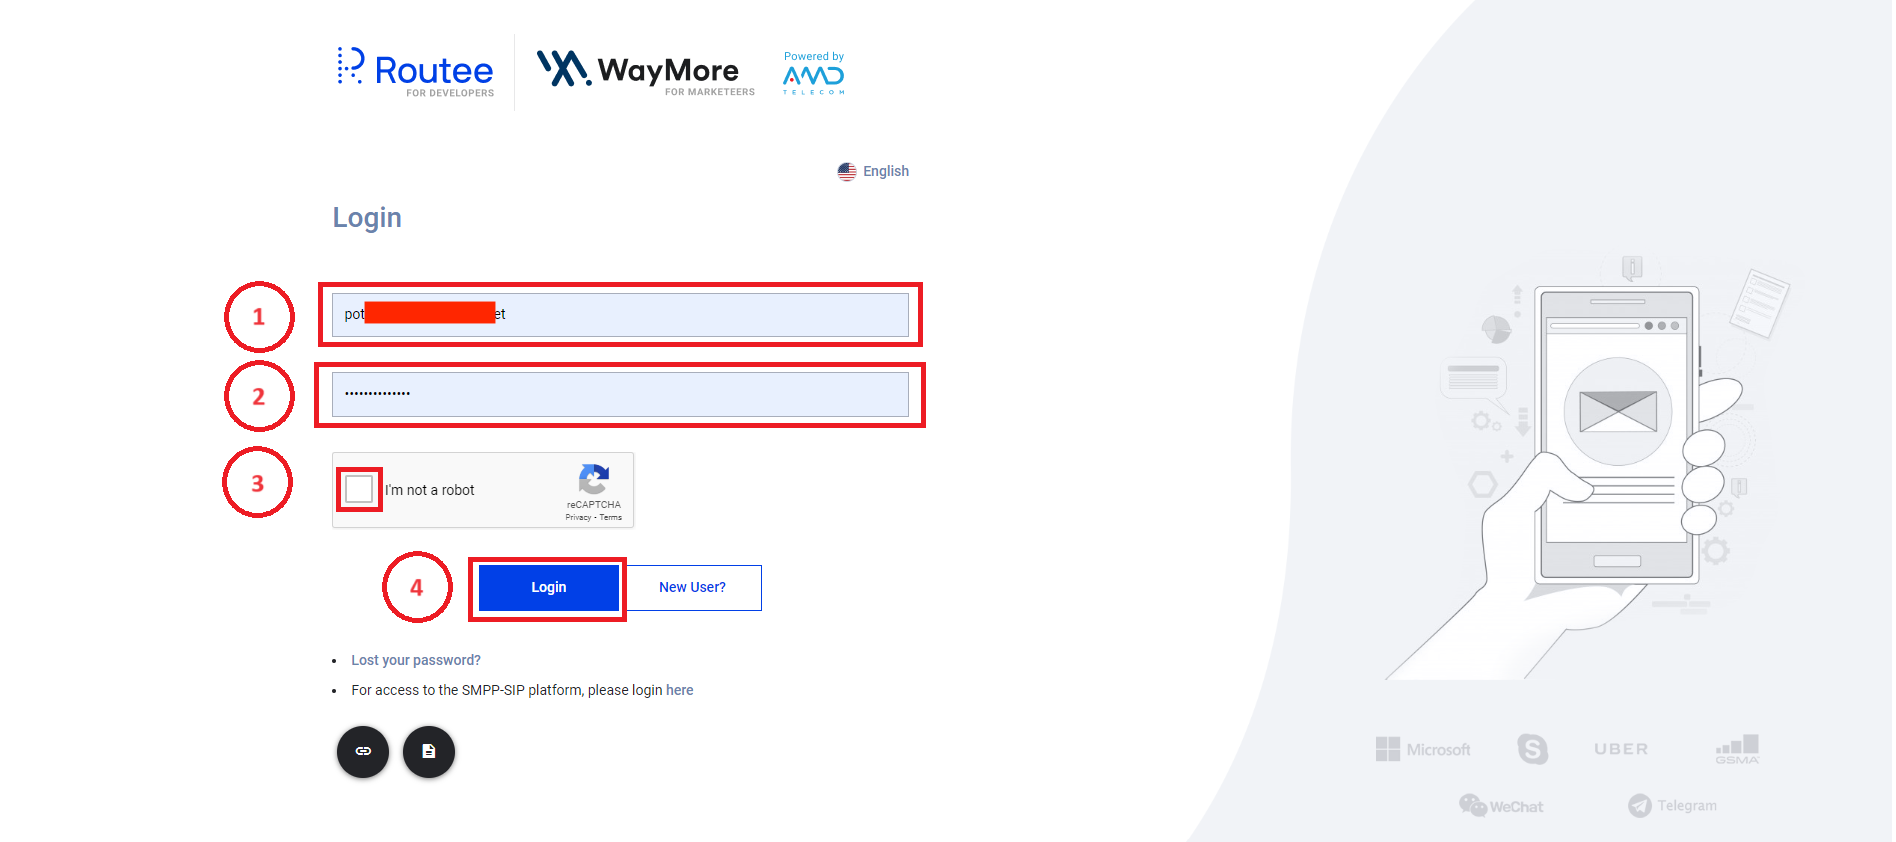
Step 3: Dashboard
On clicking the Login button, the system will redirect the user to the Routee Dashboard.

Below Dashboard screen will be displayed along with the side menu with the set of features and a top header in which few actions needs to be performed on order to use the system.
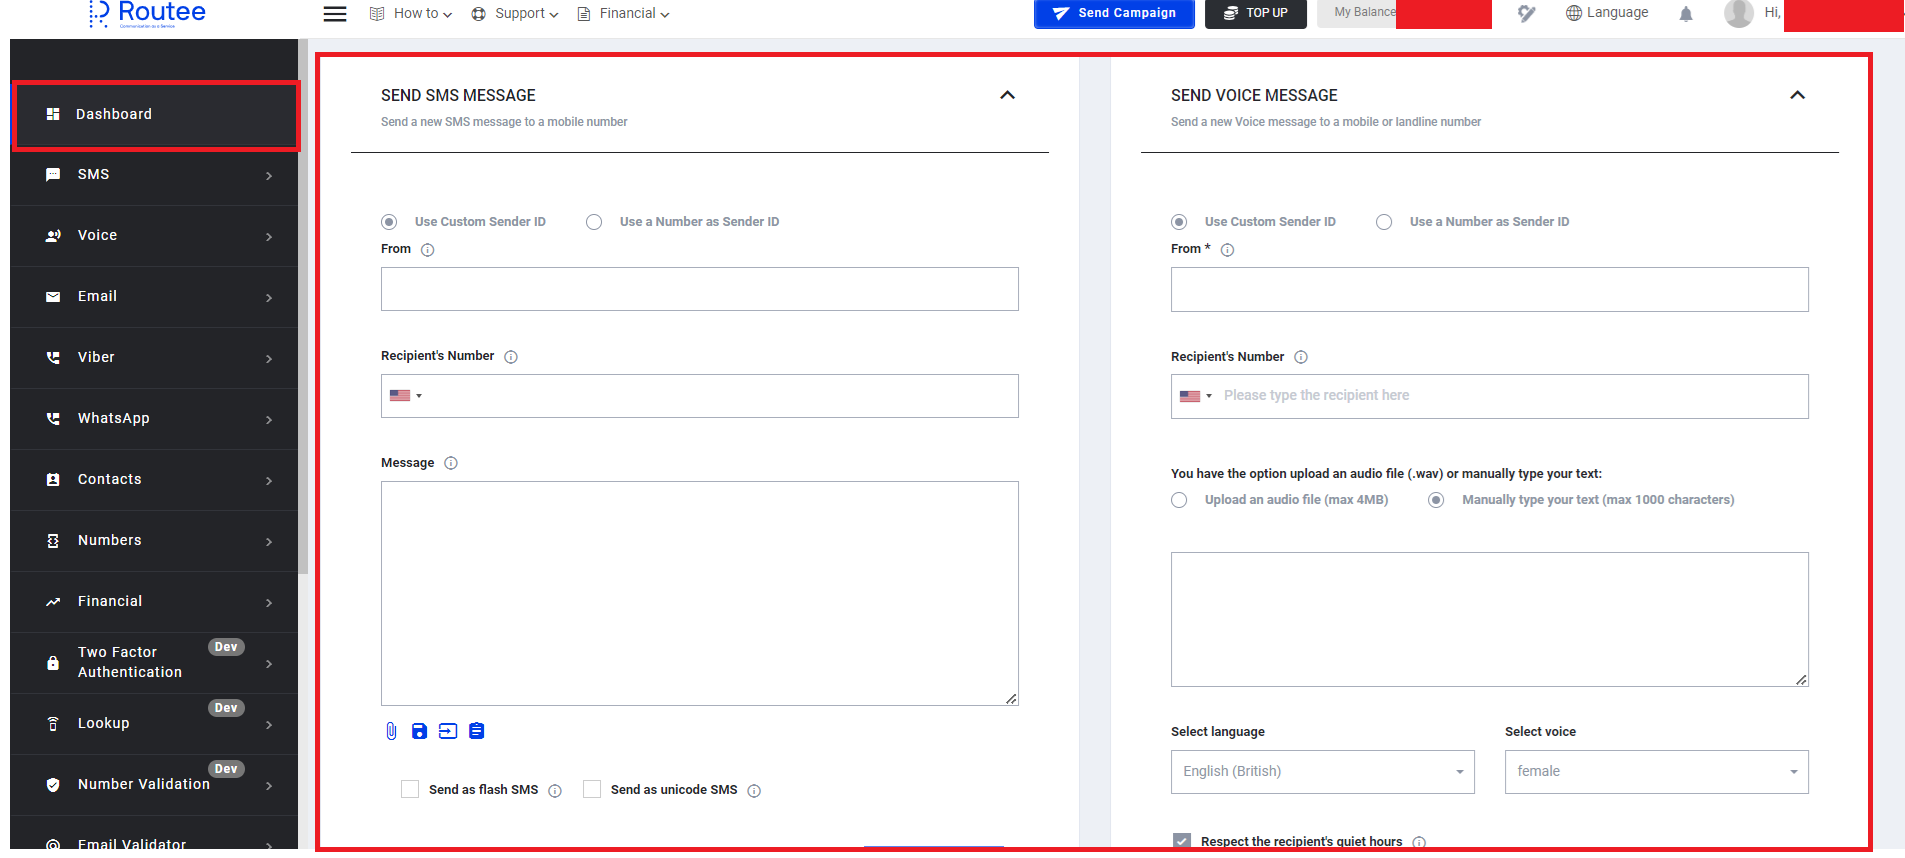
Step 4: Access Credentials Tab
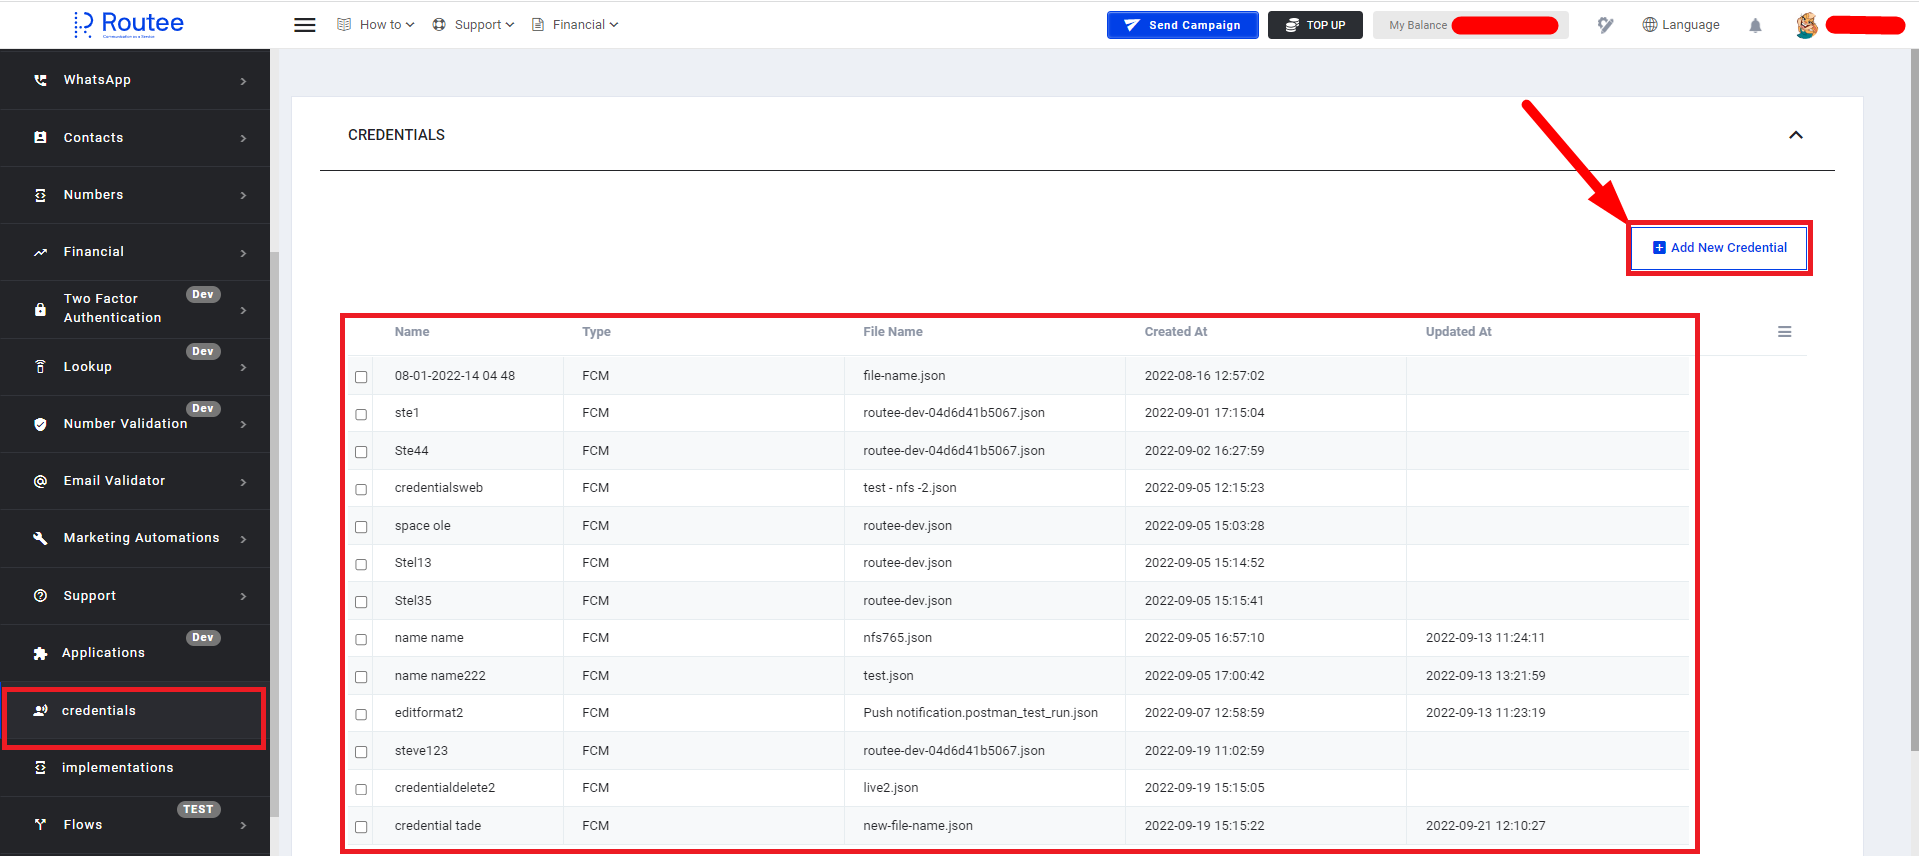
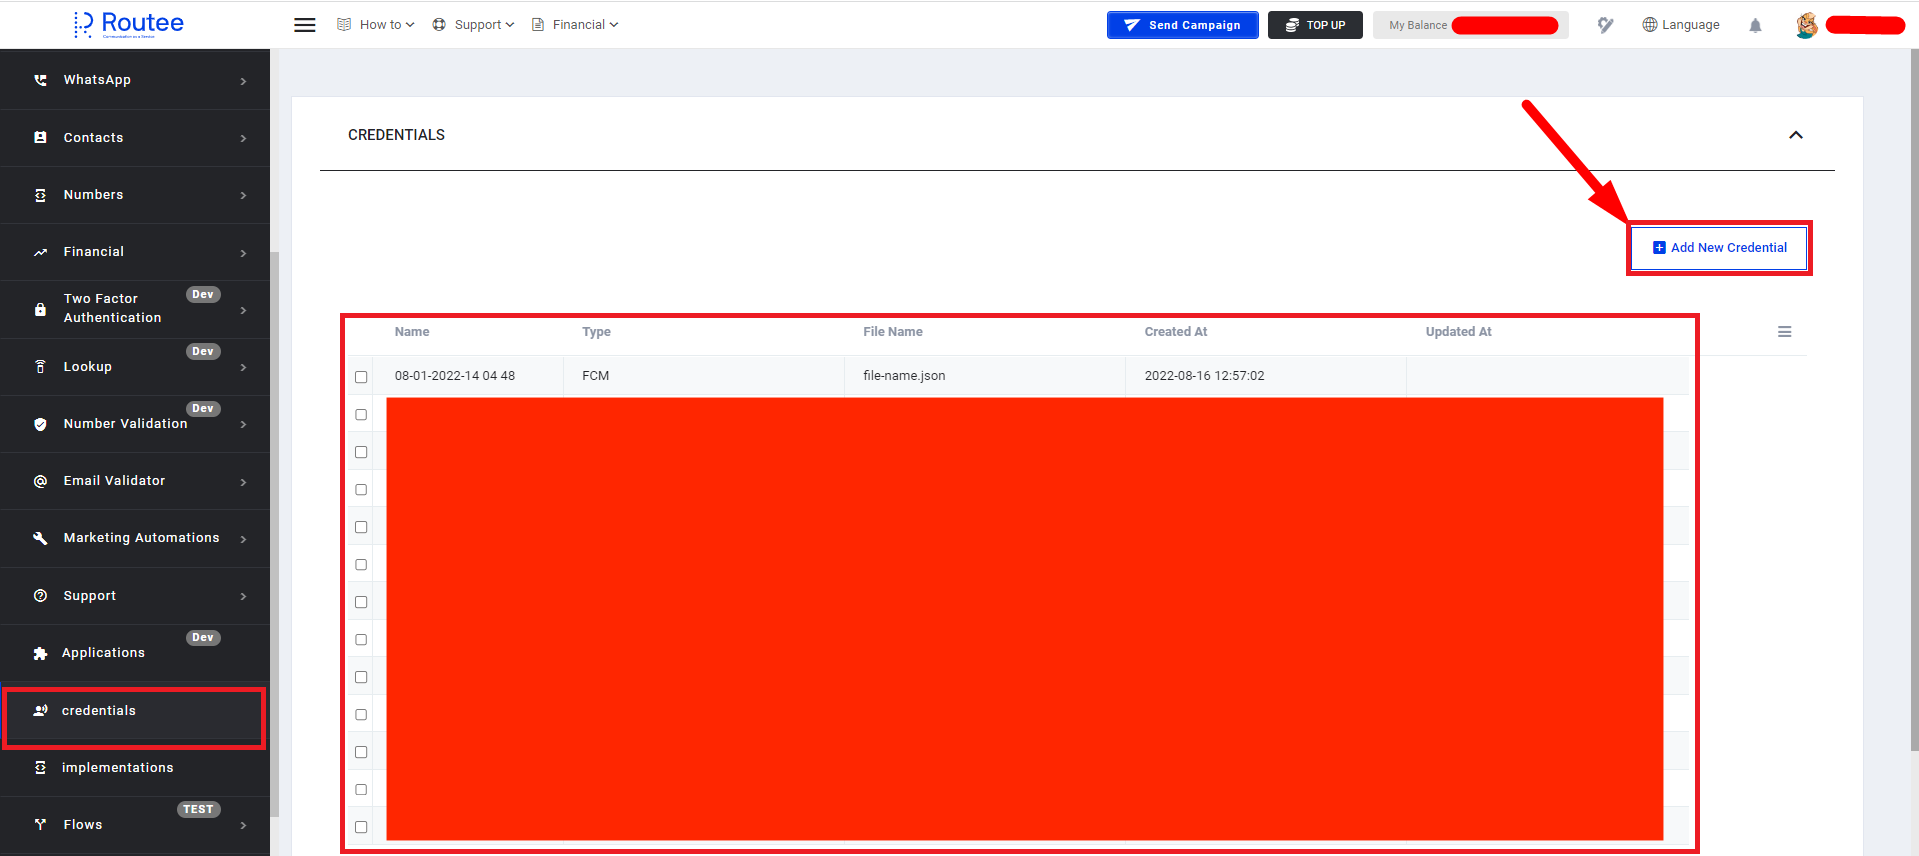
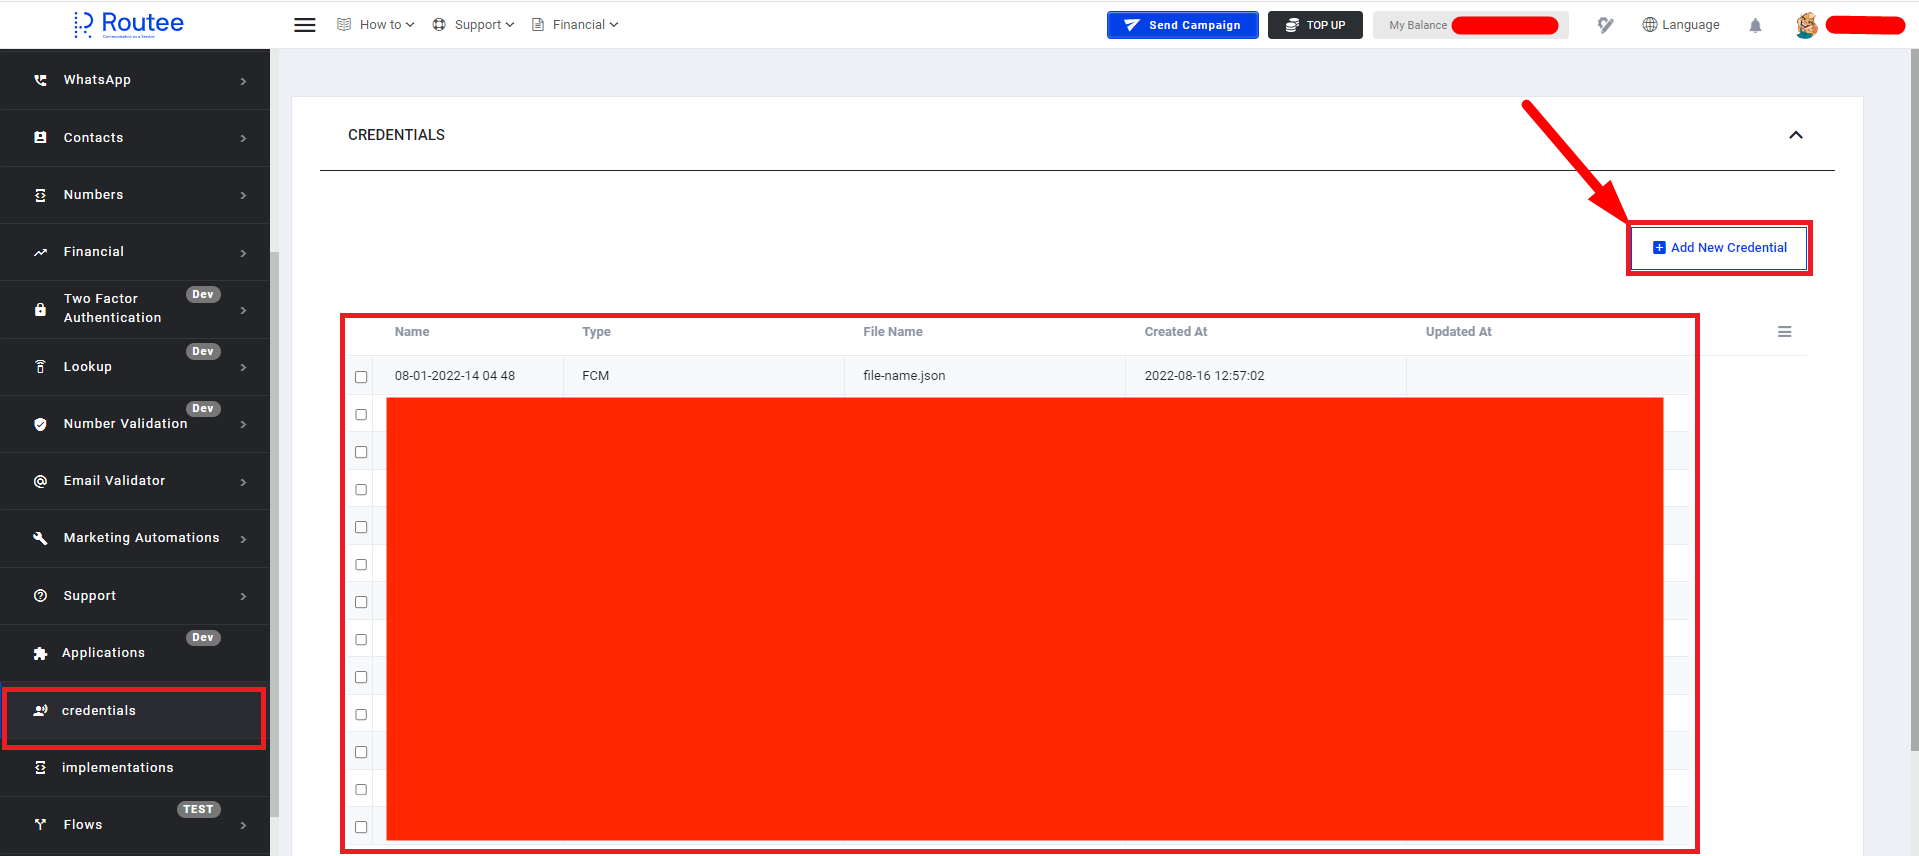
To upload Firebase credential JSON to Routee, first, you need to navigate to the Credentials page available in the left side menu.
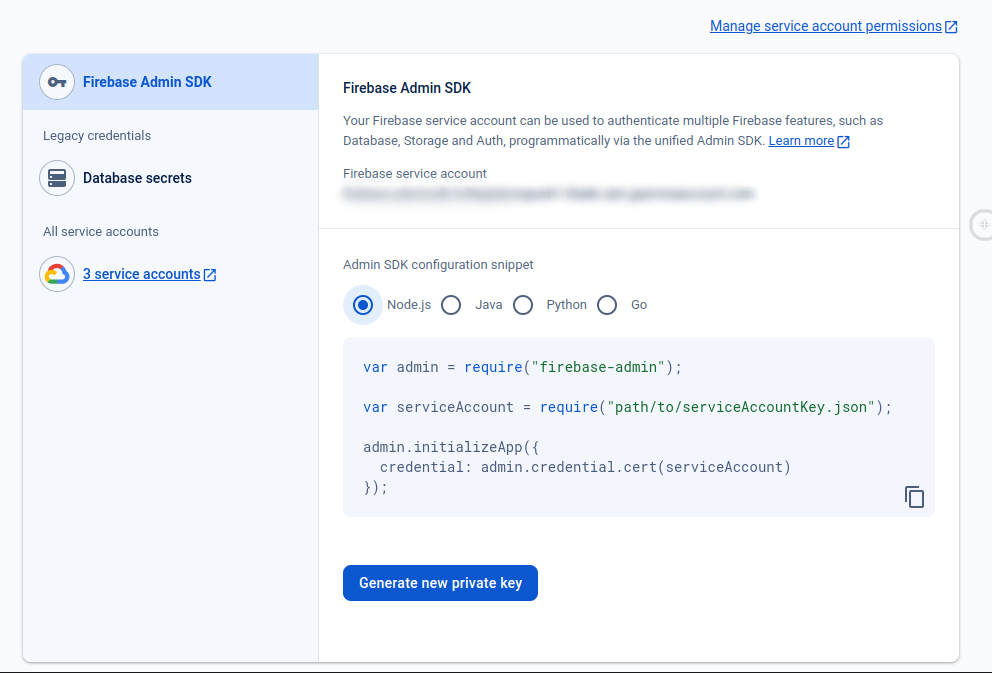
How to retrieve a Firebase project's JSON credentials
- In the Firebase console, open Settings > Service Accounts.
- Click Generate New Private Key, then confirm by clicking Generate Key.
- Securely store the JSON file containing the key.
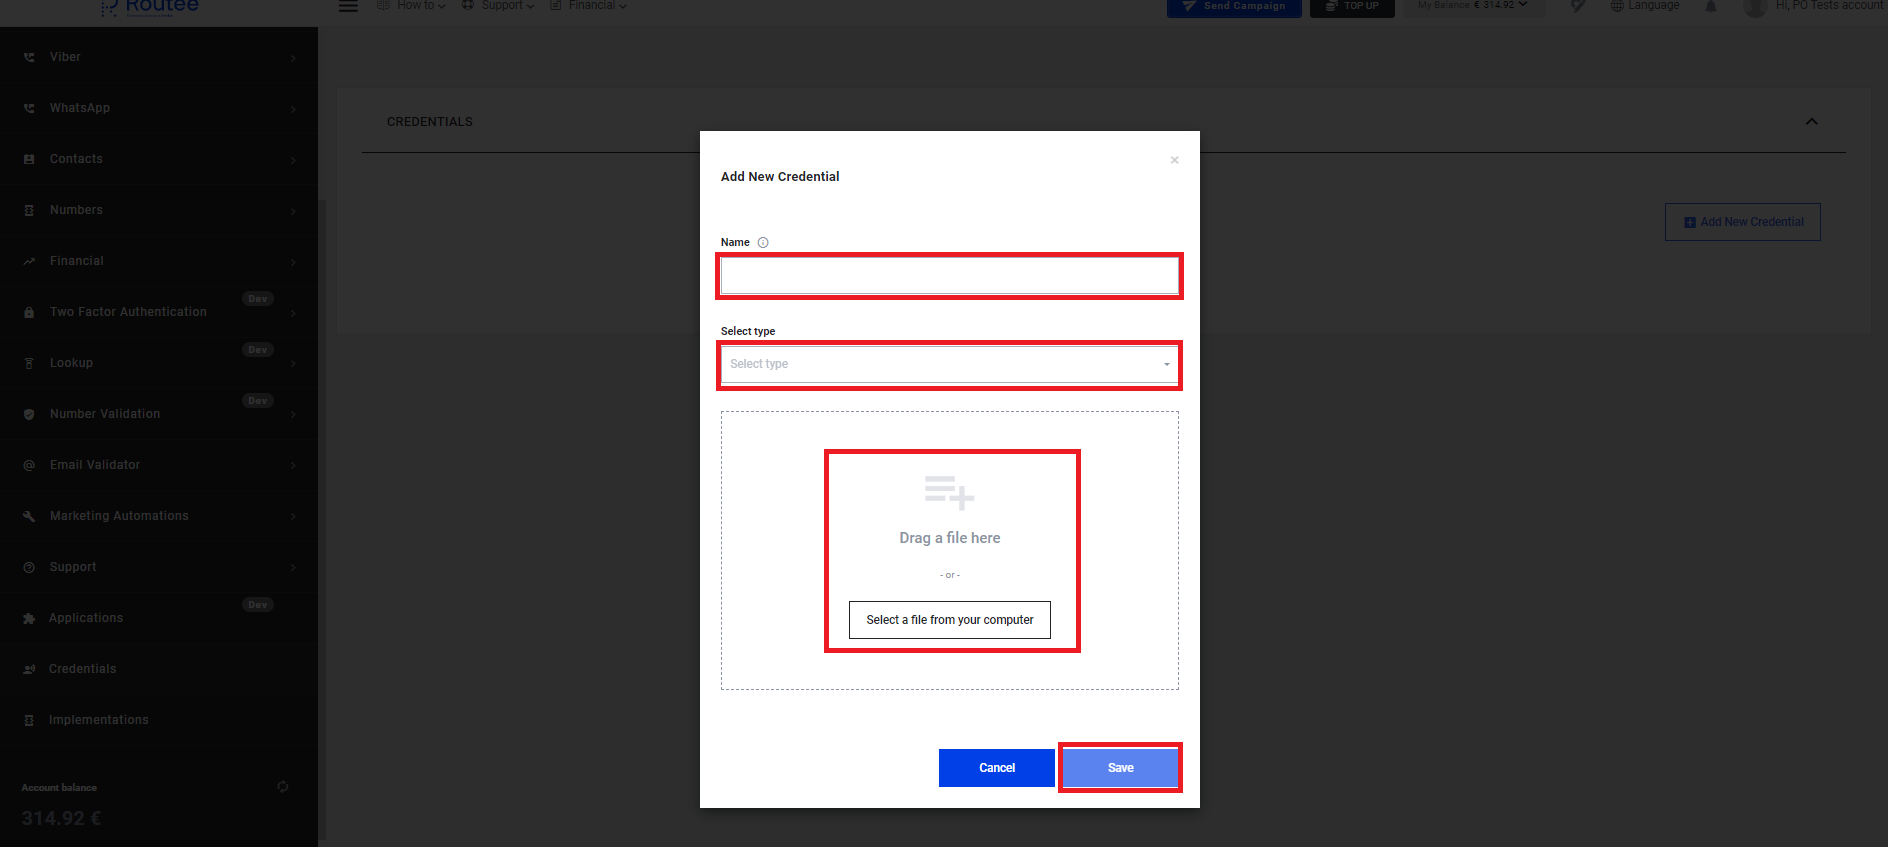
When you navigated to Credential screen, You can view the list of credentials which you have created earlier or add a new one. For adding a new one click the “Add New Credential” button. A modal window will be displayed for adding new credential appears.
Step 5: Create Credentials
In the modal window you need to add a name, type and select a file from your local computer OR drag and drop it. After that click on save button for saving the changes which has been made recently or cancel the action by pressing Cancel Button.
Step 6: Delete Credentials
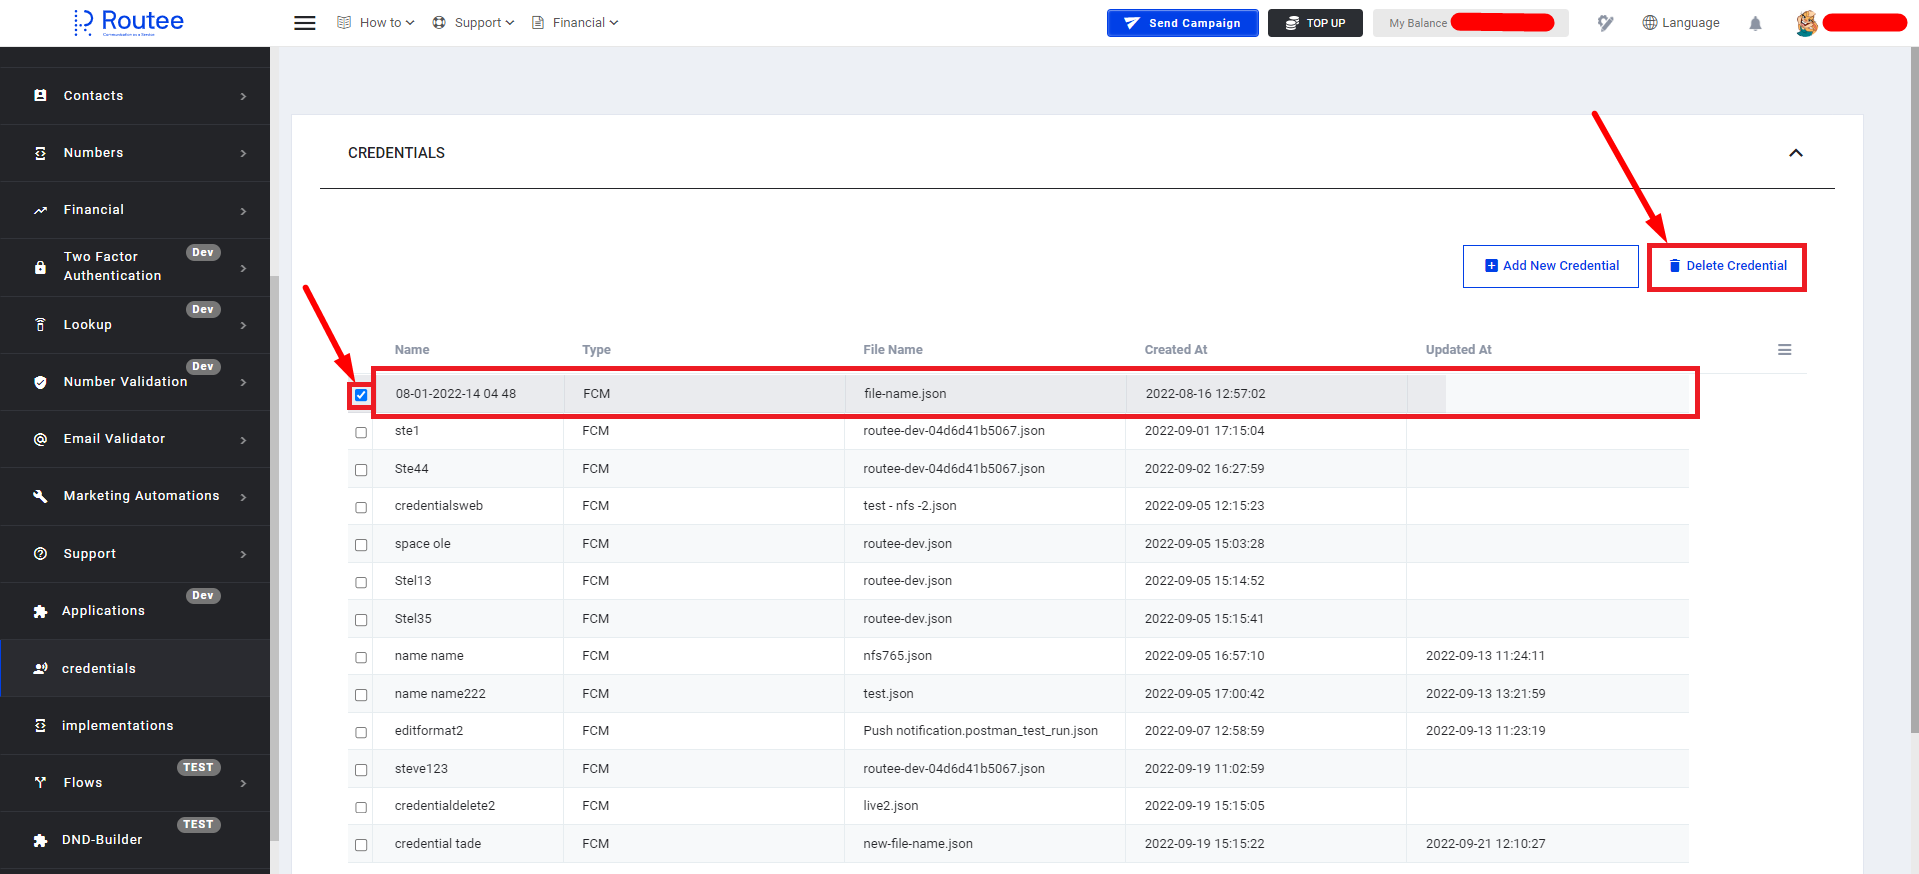
Here the newly created credentials will be displayed along with the check box to do any type of action on the selected row.
In order to delete credential you need to choose one that need to be deleted and see “Delete Credential” button which will be made visible after selection. Please click the button.
Selection may be multiple in order to delete the records.
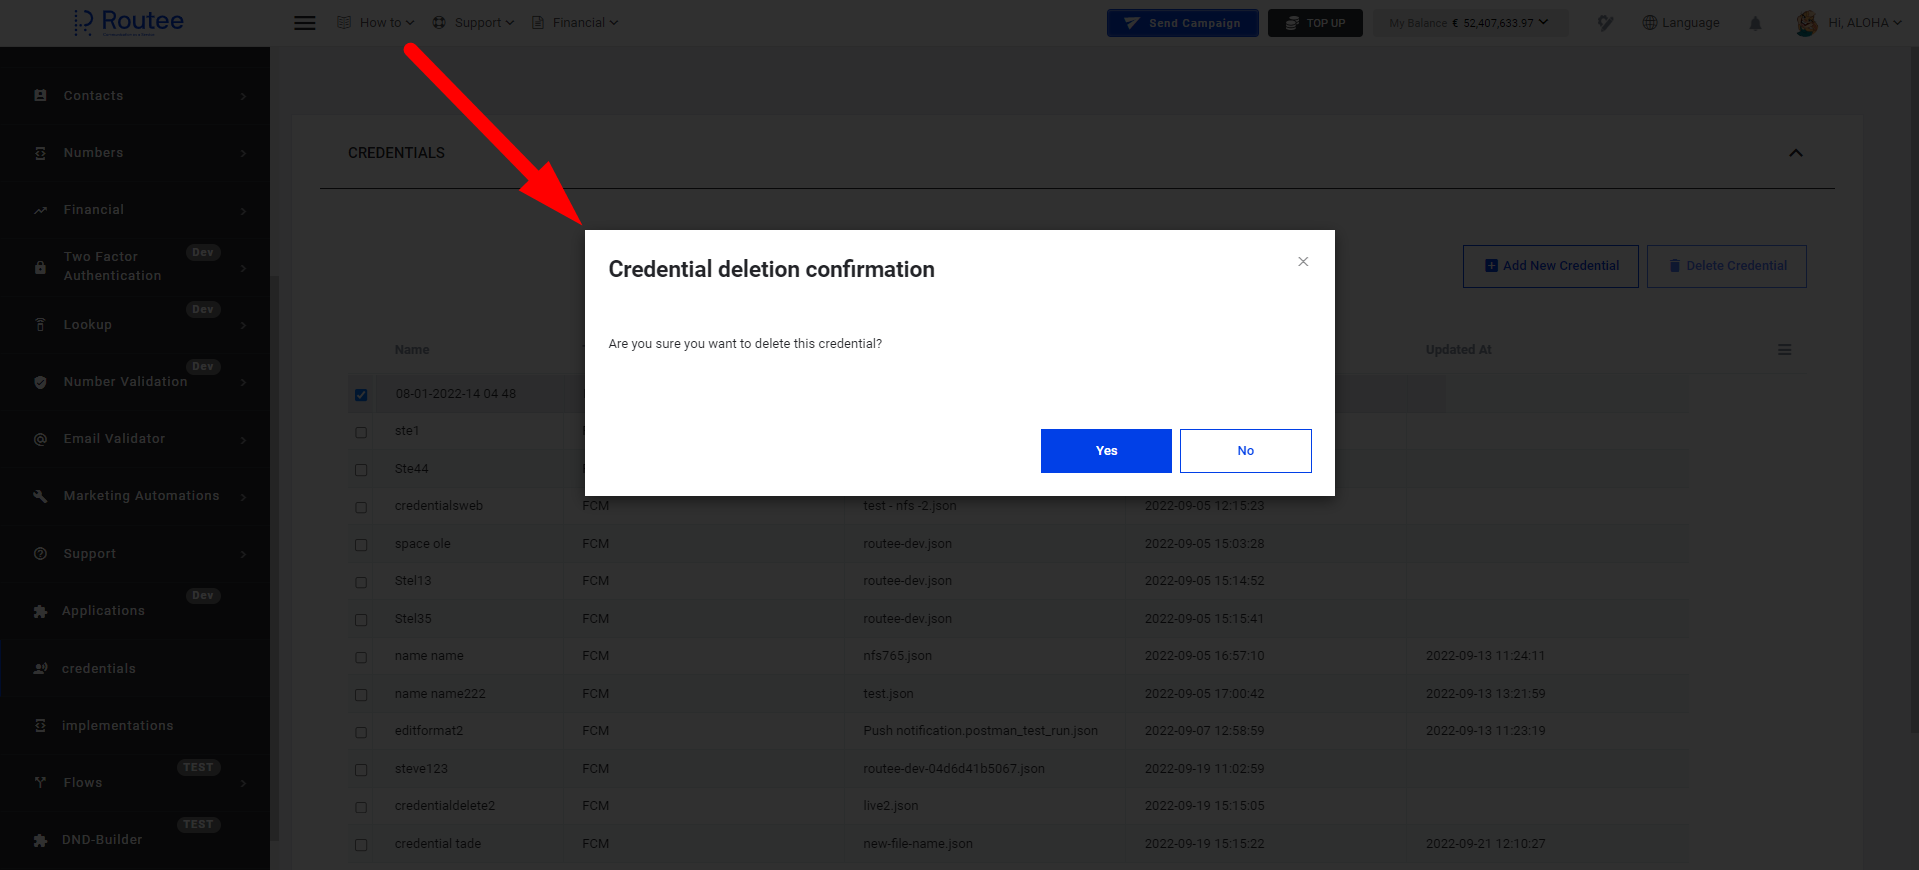
After clicking the button a modal window appears where you can confirm deletion or cancel the action.
Step 7: Access Implementation Tab
Then first you need to navigate to Implementations page.
Step 8: Create Implementation
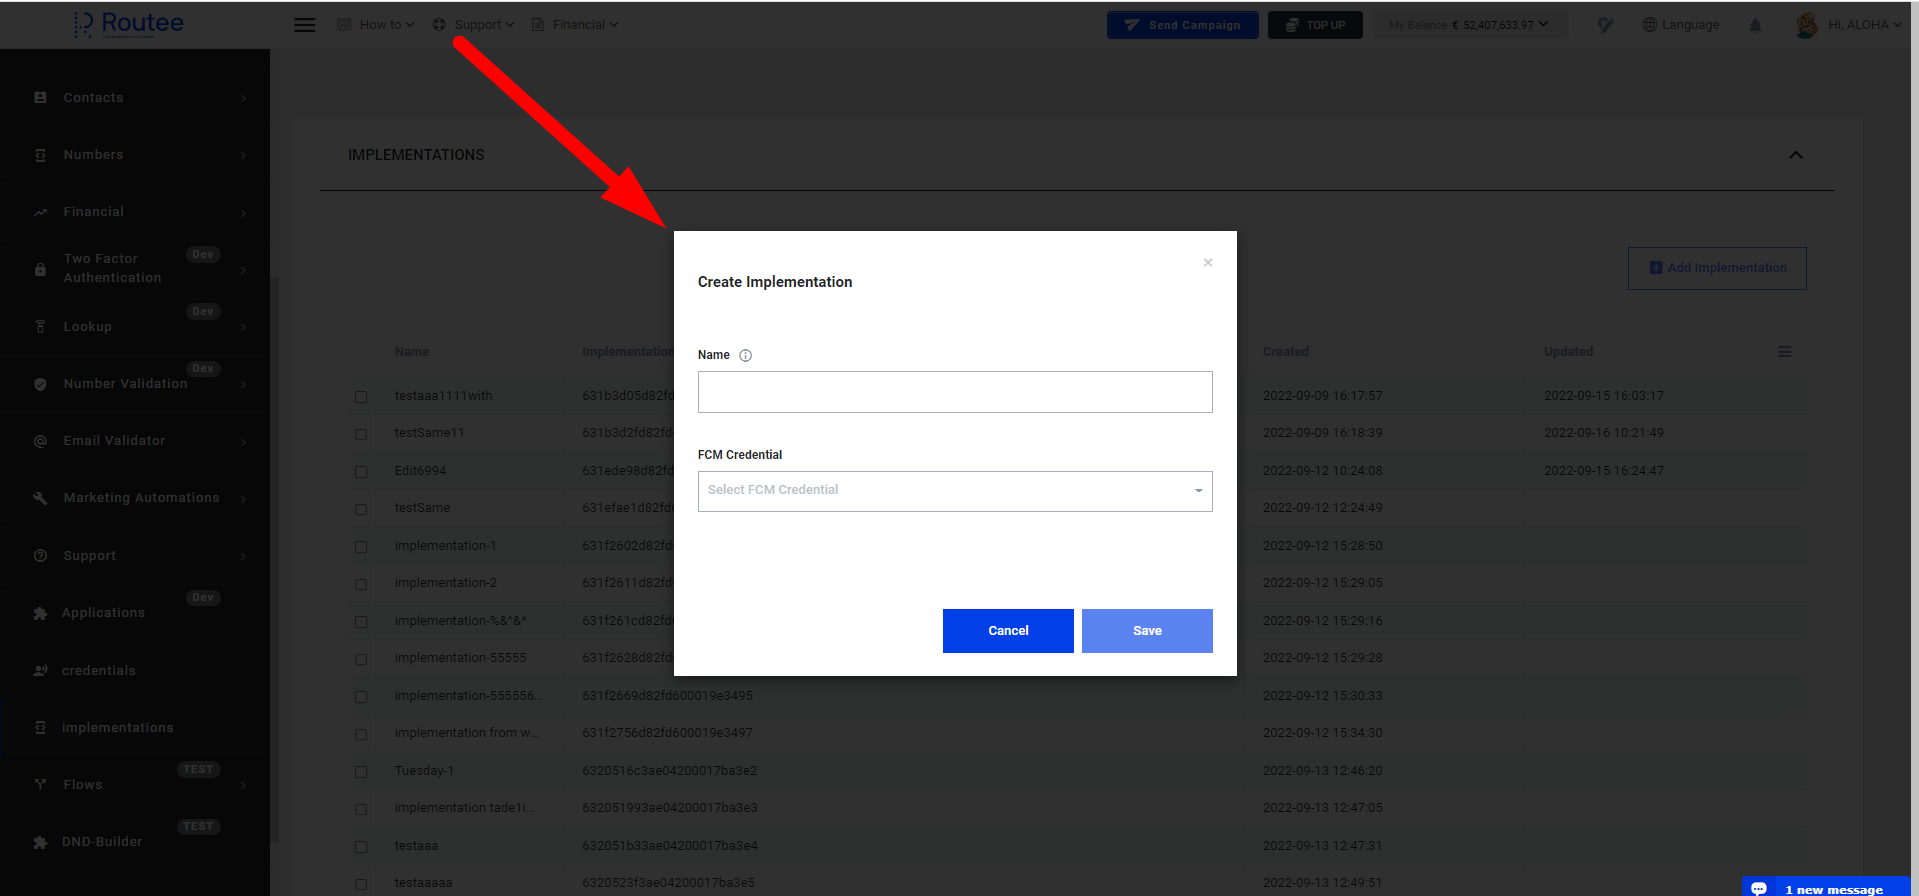
You can view the list of implementations or add a new one. For that click the “Add Implementation” button and a modal window for adding new implementation appears. In the modal window you need to add a name and choose a credential from the dropdown list. After that please save the changes or cancel the action.
Step 9: Delete Implementation
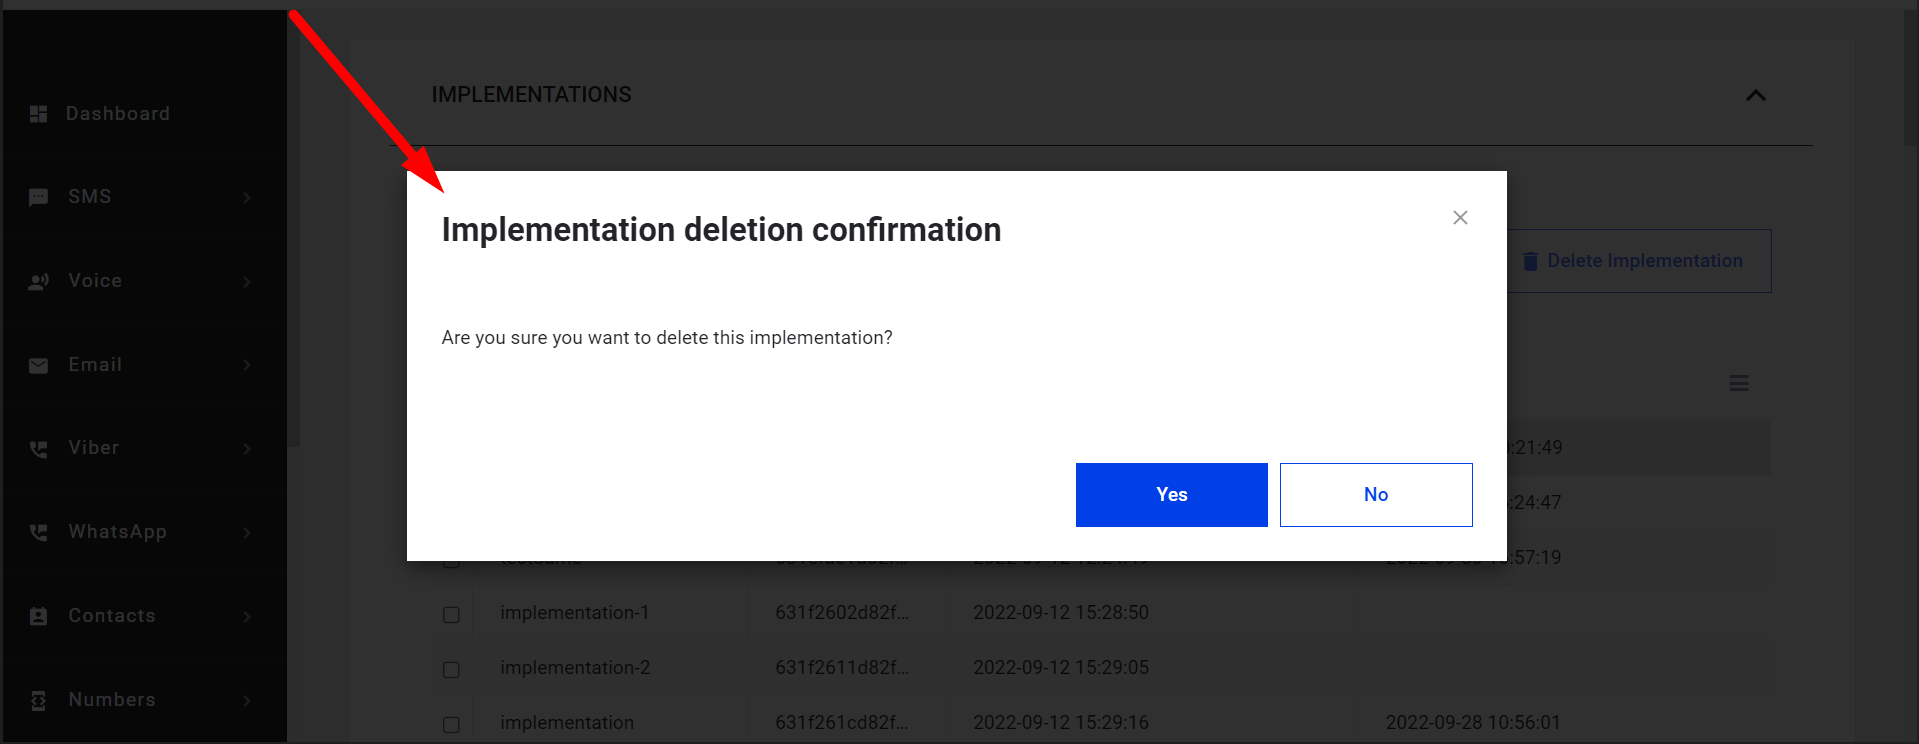
In order to delete implementation you need to choose one that needs to be deleted and see “Delete Implementation” button. Please click the button.
After clicking the button a modal window appears where you can confirm deletion or cancel the action.
Updated over 1 year ago
