How to set up and use Web Push Notifications
What are push notifications
A push notification is a brief message or alert that is sent through an installs app to everyone who has installed the app and who has enabled the receipt of these messages. It does not matter whether you have an iPhone, an Android or any other brand of phone; you can still receive these notification in order for the message to be visible. This allows you to reach a wide range of people by «pushing »your messages to en entire group at the same time.
Except from in-app push notifications there are Web Push notifications as well. All modern web browsers support them.
Example
Routee.net site has push notifications enabled, so when a guest visits the site he is prompted to subscribe to push notifications.

How to send push notification campaigns from WayMore platform
You can use your Router.net credentials to login to way more platform at:
or
1. Prerequisites
In order to implement WayMore’s push notification service to your website make sure you have the following ready:
- Have an active Routee / WayMore account and, of course, access to it.
- Have FTO access to you host server.
- Have access to you CMS admin panel.
2. Setting up
Register you website on WayMore
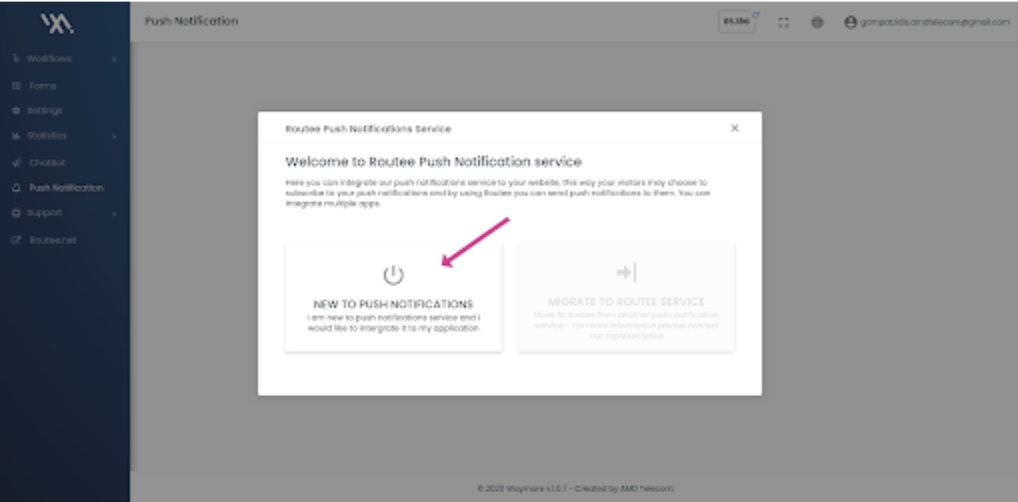
First of all you will have to login to your WayMore account and navigate to Communication >> Push notification menu on the left side panel.

A wizard will pop up and guide you through the next steps.
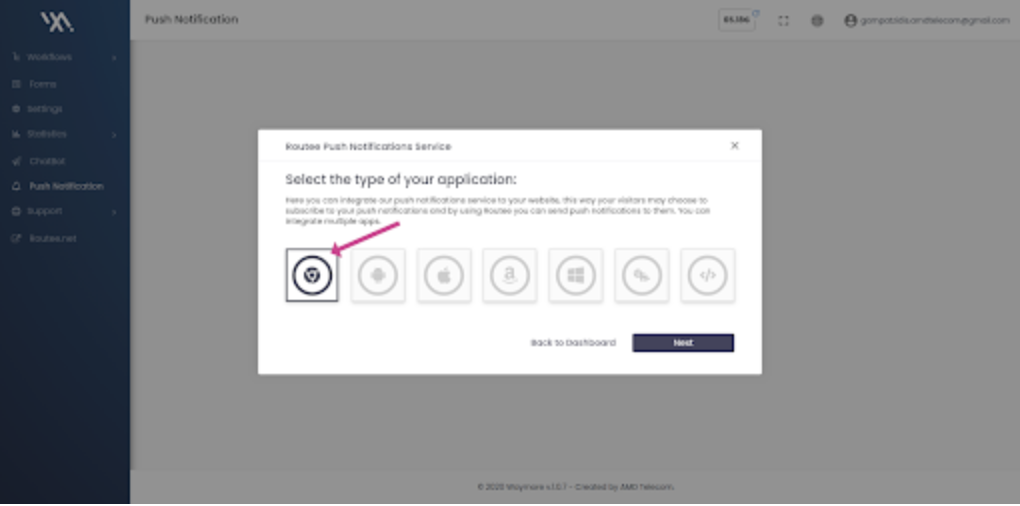
Select «New to Push Notifications» and then «Web Push Notifications» as shown down below:
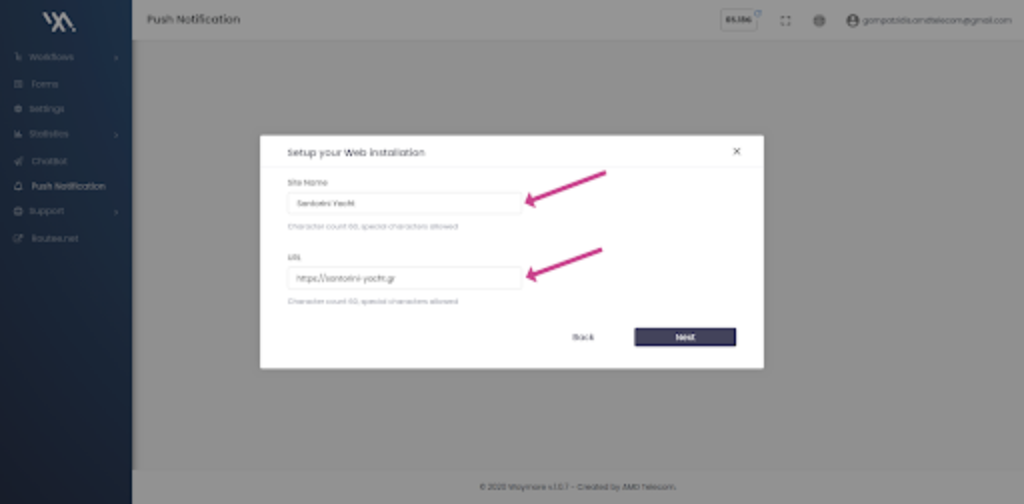
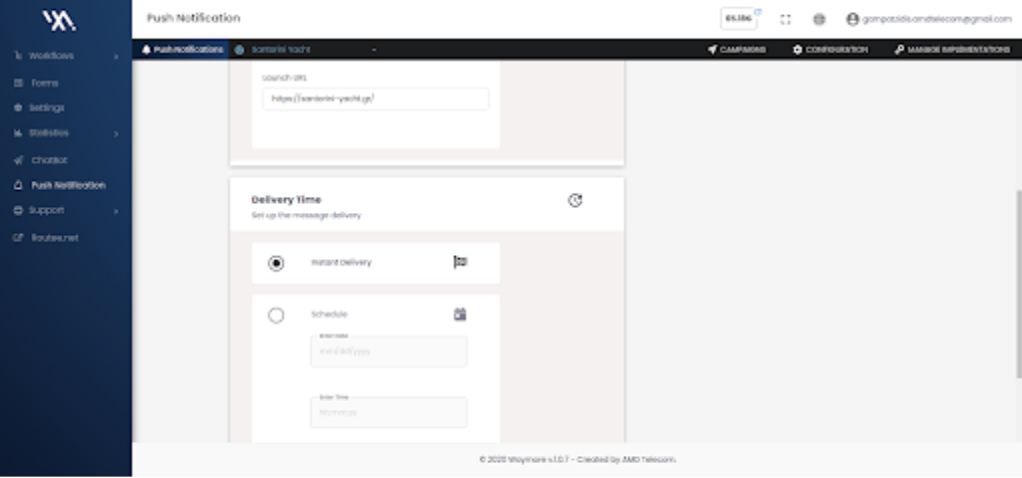
Set up the name of your project and the URL address of your website.
Note that your website should run on a secure version of HTTP. So your domain name should follow the HTTPS protocol and not include anything after the extension, e.g.
Https://santorini-yacht.gr
The SDK file
On this step you have to download the SDK file from WayMore and install it to the root directory of your website.
Click on the «DOWNLOAD SDK» button
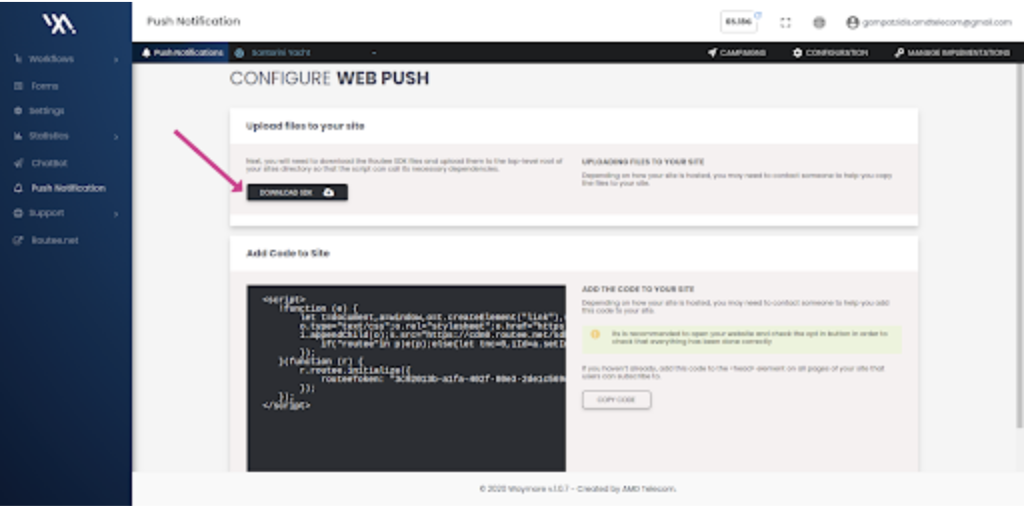
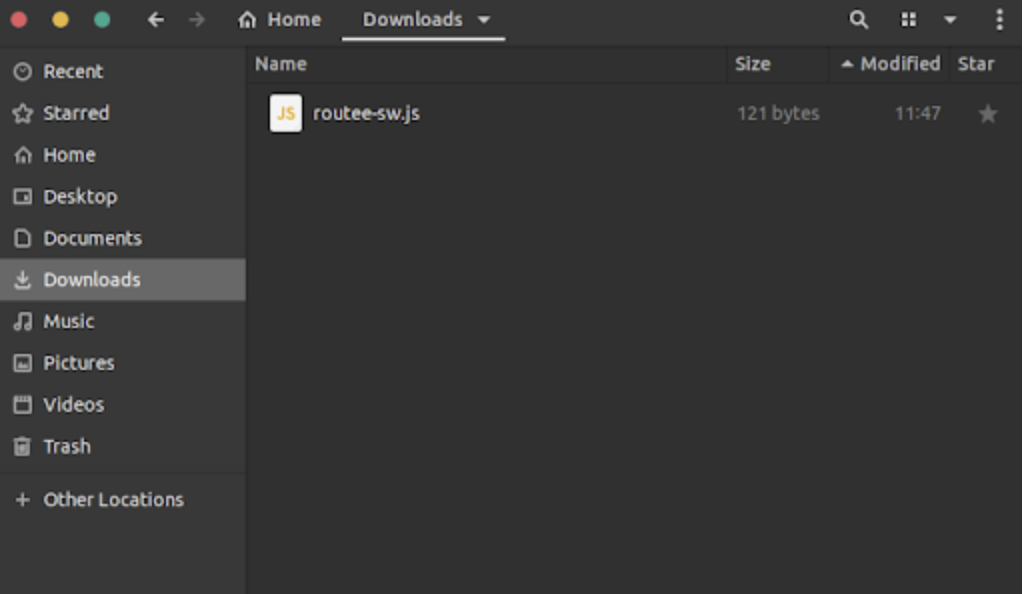
You will find the «routee-sw.js» on your Downloads folder.
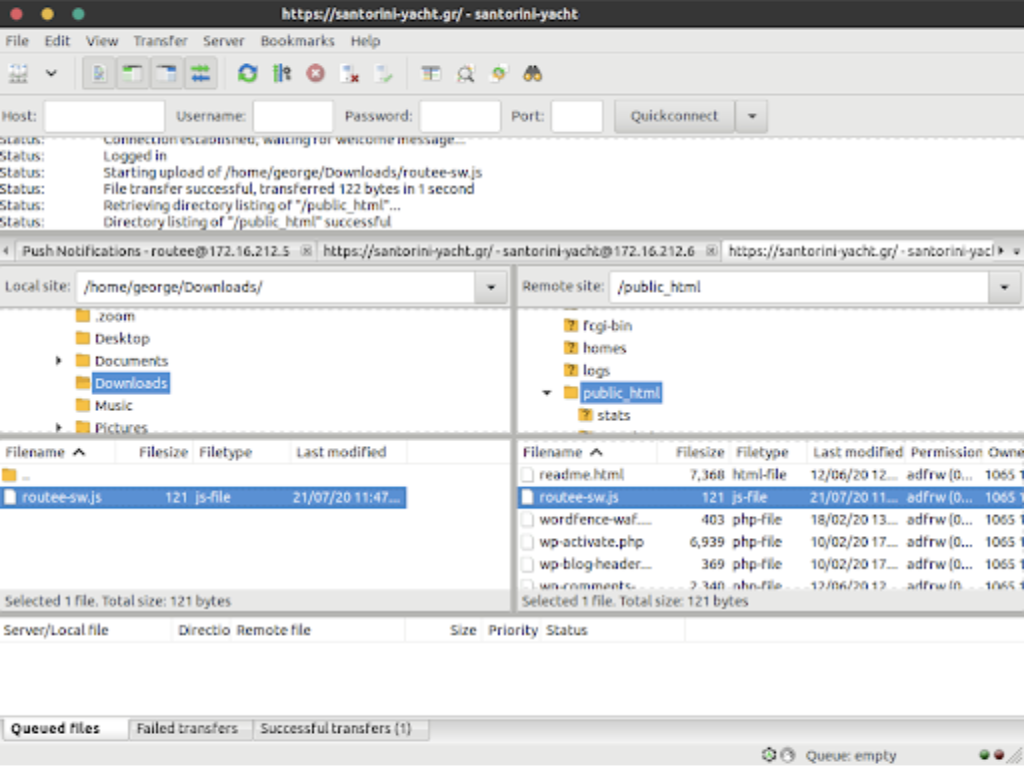
Upload the SDK file
Now you will have to upload the «router-sw.js» to the root of your website’s directory. You should have FTP access to your host server in order to proceed with the task.
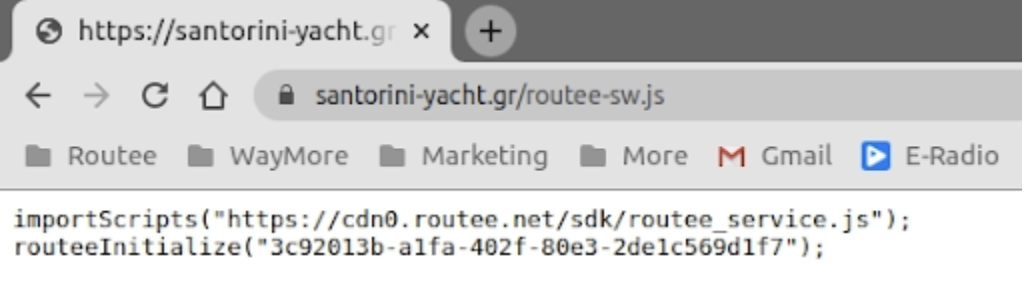
In order ti ensure that this step has been completed successfully check that the router-sw.js is publicly available for the access via your web browser. To do so just visit your domain name followed by «/routee-sw.js» as shown in the example down below:
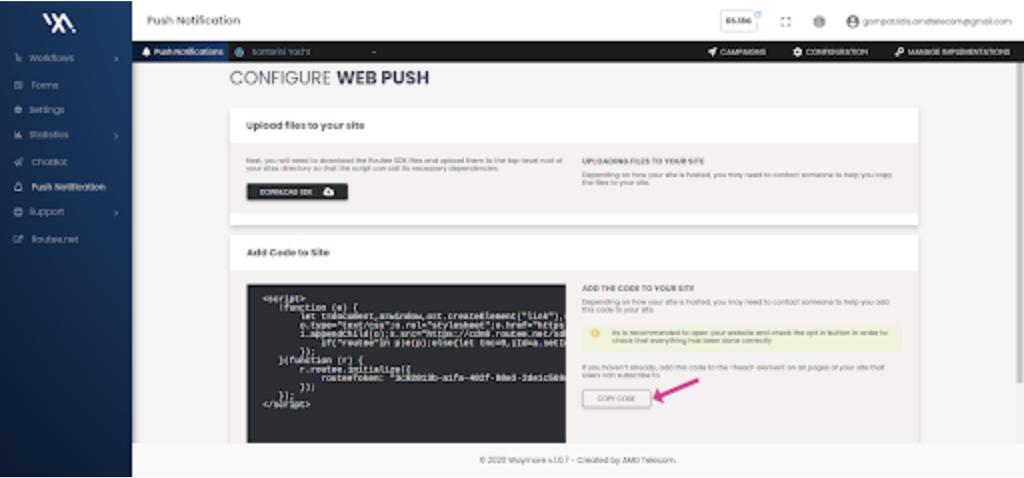
The Snippet
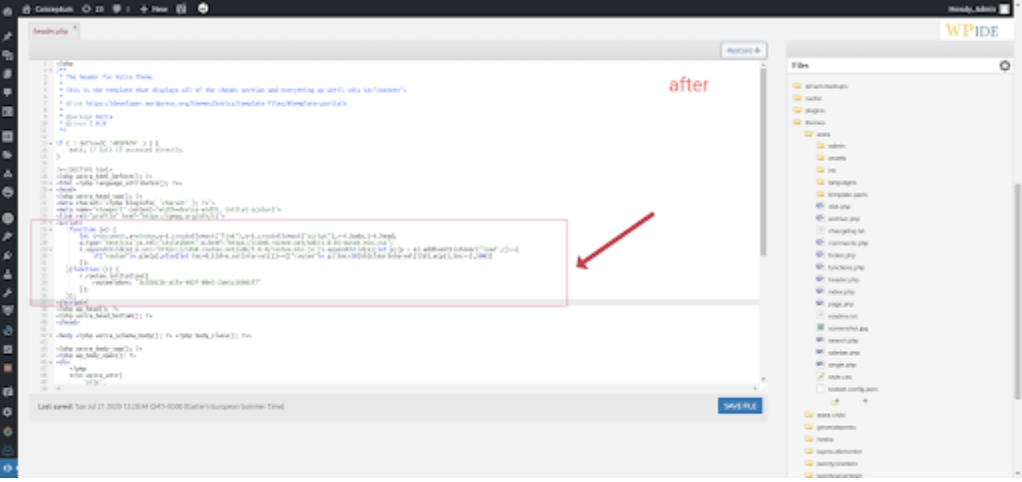
On this step you have to copy the snippet from WayMOre and paste it to the head element of your website.
Copying the code from WayMore
Click on the «COPY CODE» button
Pasting the code
You can access you «Head» element either through admin panel (depending on your CMS or through FTP)
In this case we will access it via WordPress CMS admin panel.
Login to your CMS admin panel and paste the snippet to your head element of your website.
Check your Website
Now everything should be set and working. Check you website fro the push notification promo. Don’t forget to make sure that push notifications feature is not disabled on your web browser.

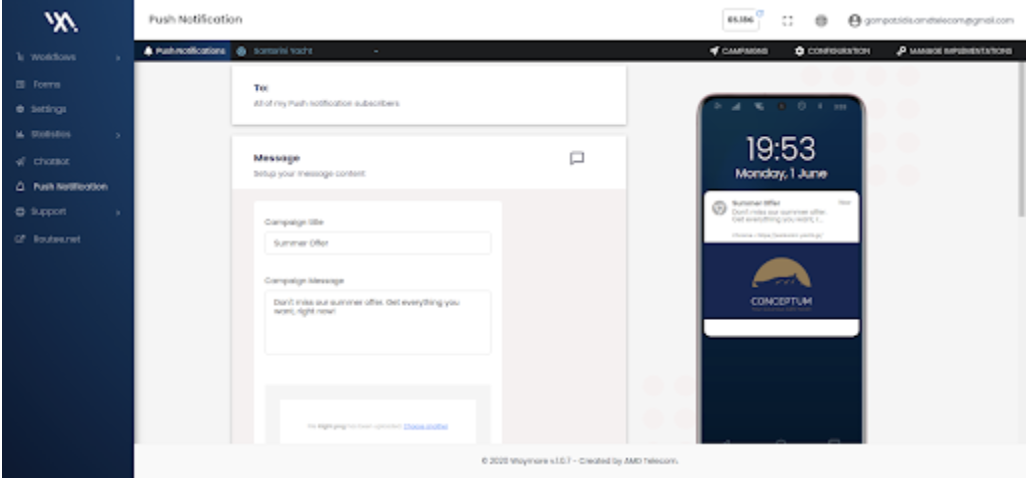
Send your first campaign
Set your first campaign title, message, attach an image (2:1 resolution) of your wish and an URL to be launched if clicked by the user. That’s all, everything is set and ready to go. Confirm and your first push notification campaign will be on its way.

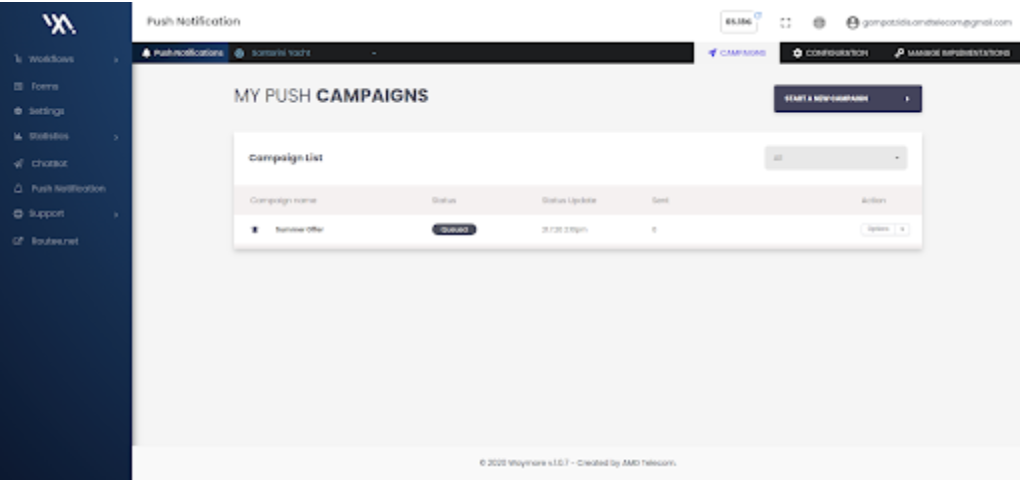
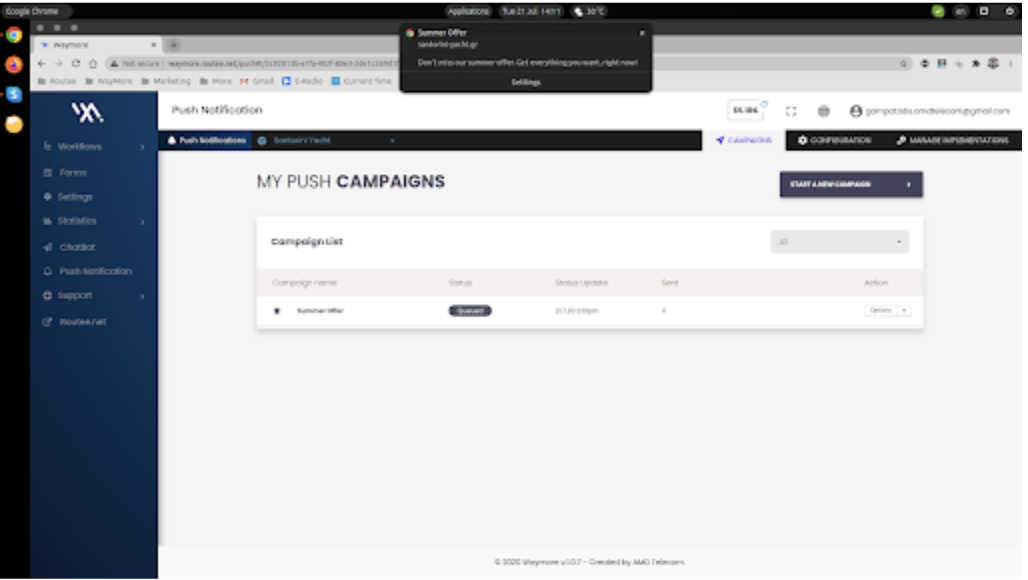
When you send a campaign it is automatically placed on your history list and tagged as «Queued».
Your push notification on Google’s Chrome browser (Linux version) will show up like this:
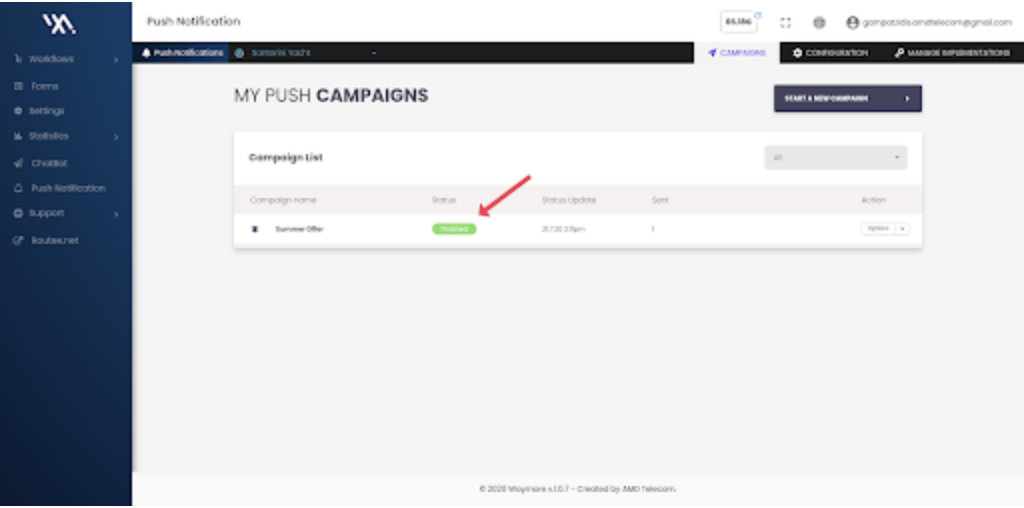
Finally after a successful push notification campaign the status of your campaign will be automatically update to «Finished».
Updated 11 days ago