Push Notification for Web
Overview
Setting up Firebase for your web application is a simple process that seamlessly integrates your project with a powerful suite of tools aimed at enhancing your app development experience. Firebase offers features such as real-time databases, user authentication, analytics, and more, eliminating the need for managing backend code or servers. This guide will walk you through the process of integrating Firebase into your web application, beginning with creating a Firebase project and including the necessary Firebase SDKs in your app.
Before we proceed with the step-by-step setup, let's ensure you meet the prerequisites. By completing this setup, you'll unlock Firebase's full potential and elevate your web development projects.
Prerequisites
Before you begin the integration process, certain preconditions need to be fulfilled:
- Signed In from Google Account: You must be signed into a Google account. This is necessary because Firebase services are tied to Google Cloud, and a Google account is required to access the Firebase console.
- Firebase Project Created onconsole.firebase.google.com: You need to have an active Firebase project. If you haven’t created one yet, you'll need to set up a new project in the Firebase console. This serves as the container for your app and its associated services.
- Google Analytics Enabled: Ensure that Google Analytics is enabled for your Firebase project. This is crucial for tracking user interactions and behaviors within your app, which helps in making data-driven improvements.
- Configured Google Analytics: Along with enabling Google Analytics, it should be properly configured to meet the specific needs of your app, such as setting user data privacy options and connecting it with other Google services if necessary.
Steps by Step Guide to Setup Firebase for Web
Following are the main steps to follow for the setup of firebase for web app
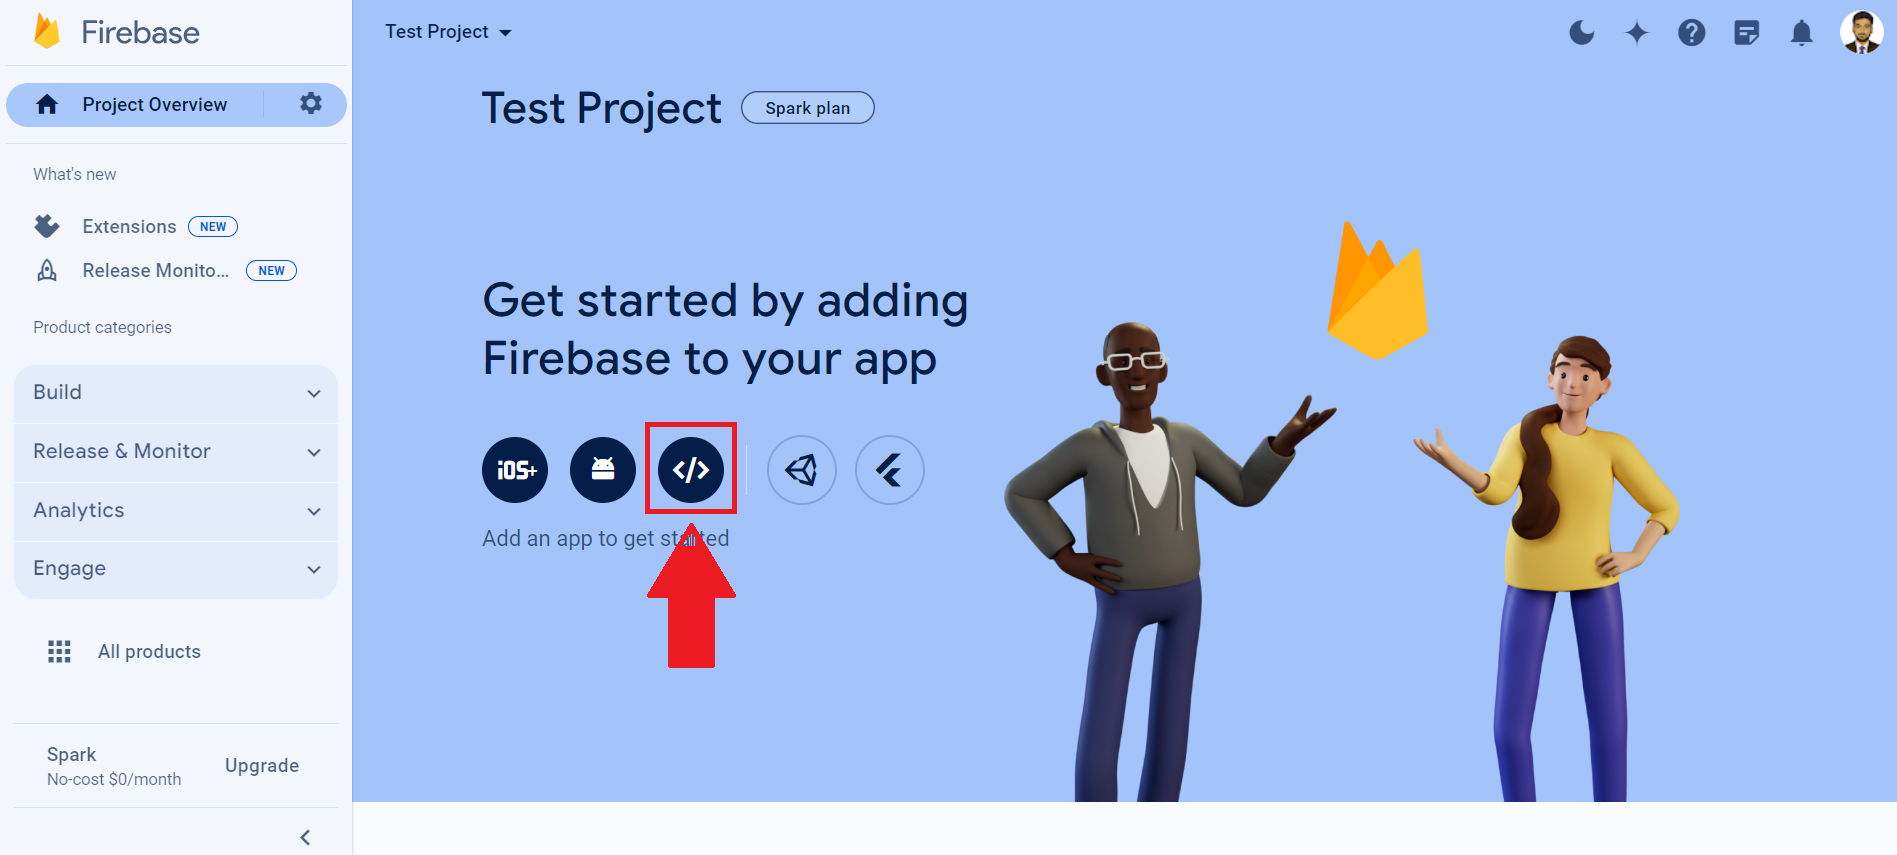
Step 1: Click on Web Icon
Open your project and click the Web icon. Here is an icon of </> to navigate to start the process of setting up firebase on web.
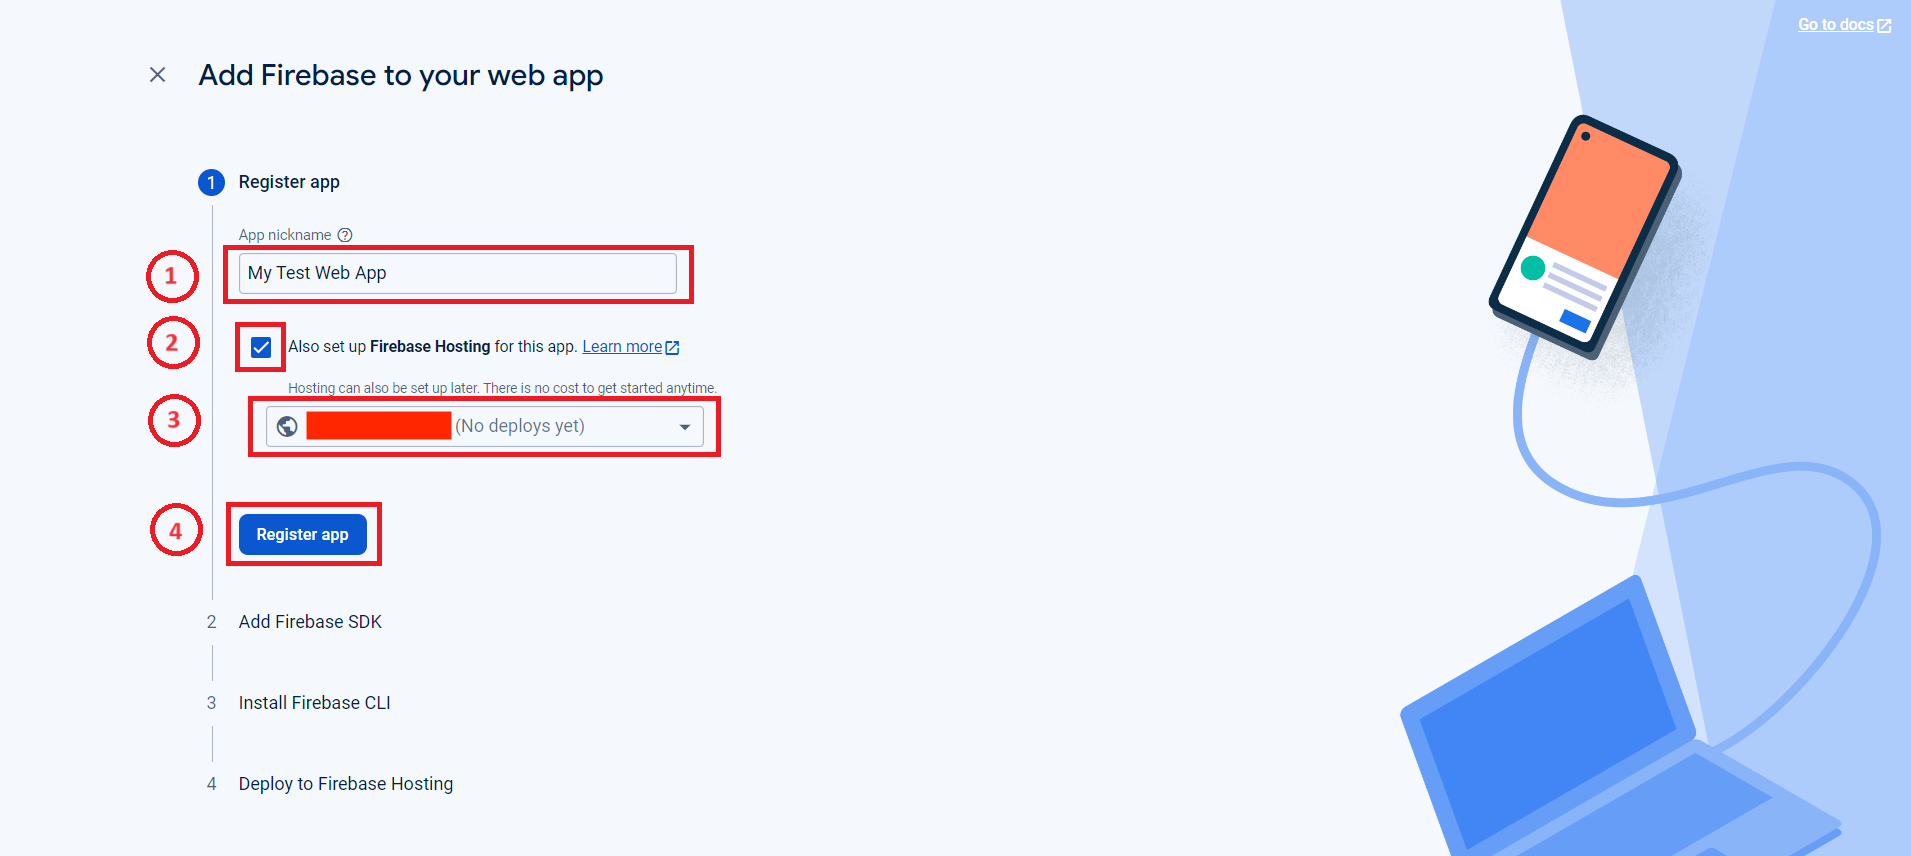
Step 2: Register App
In this step, you need to add the app nickname (e.g. My Test Web App) and enabled the checkbox “Also setup Firebase Hosting for the app“.
Below is the reference of the project which have been created recently on the firebase in earlier steps. Just need to select the project from the dropdown and finally click on Register App button
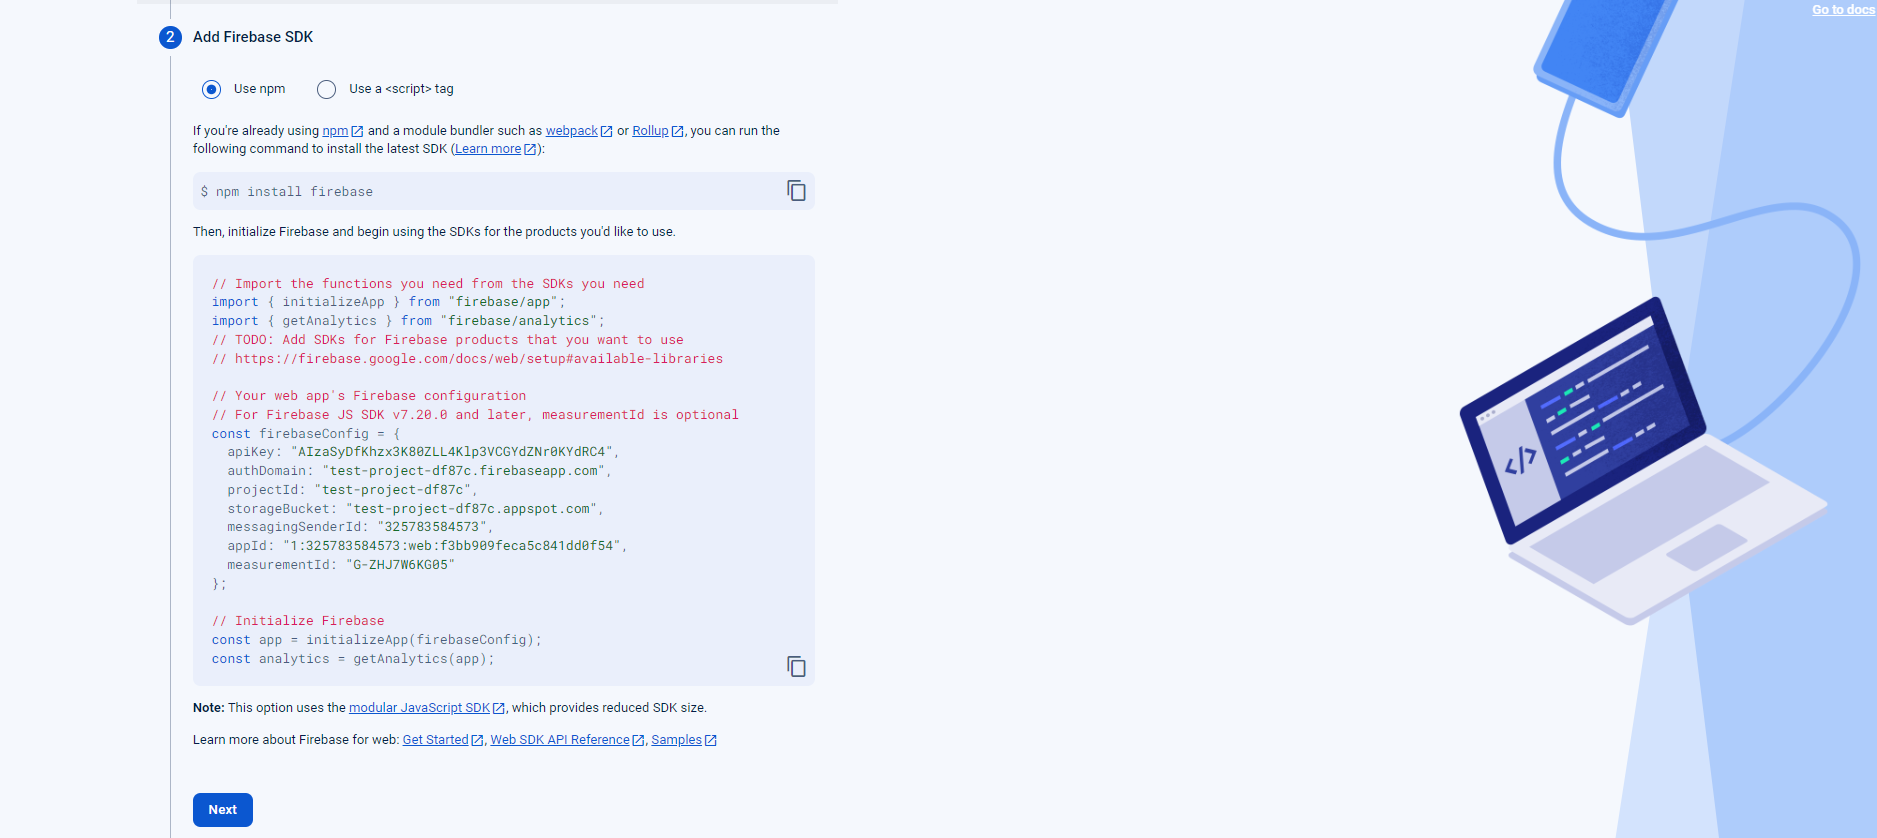
Step 3: Add Firebase SDK
If you don't use build tools, use this option to add and use the Firebase JS SDK. Use this option to get started, but it's not recommended for production apps. Learn more
Copy and paste these scripts into the bottom of your <body> tag, but before you use any Firebase services:
After this, click on Next Button
Document Extract Example
To get browser registration token use method
messaging.getToken()which returns the promise with registration token as a result.
Note: This option uses the modular JavaScript SDK, which provides reduced SDK size.
Here are the guides through which you can Learn more about Firebase for web: Get Started, Web SDK API, Reference, Samples
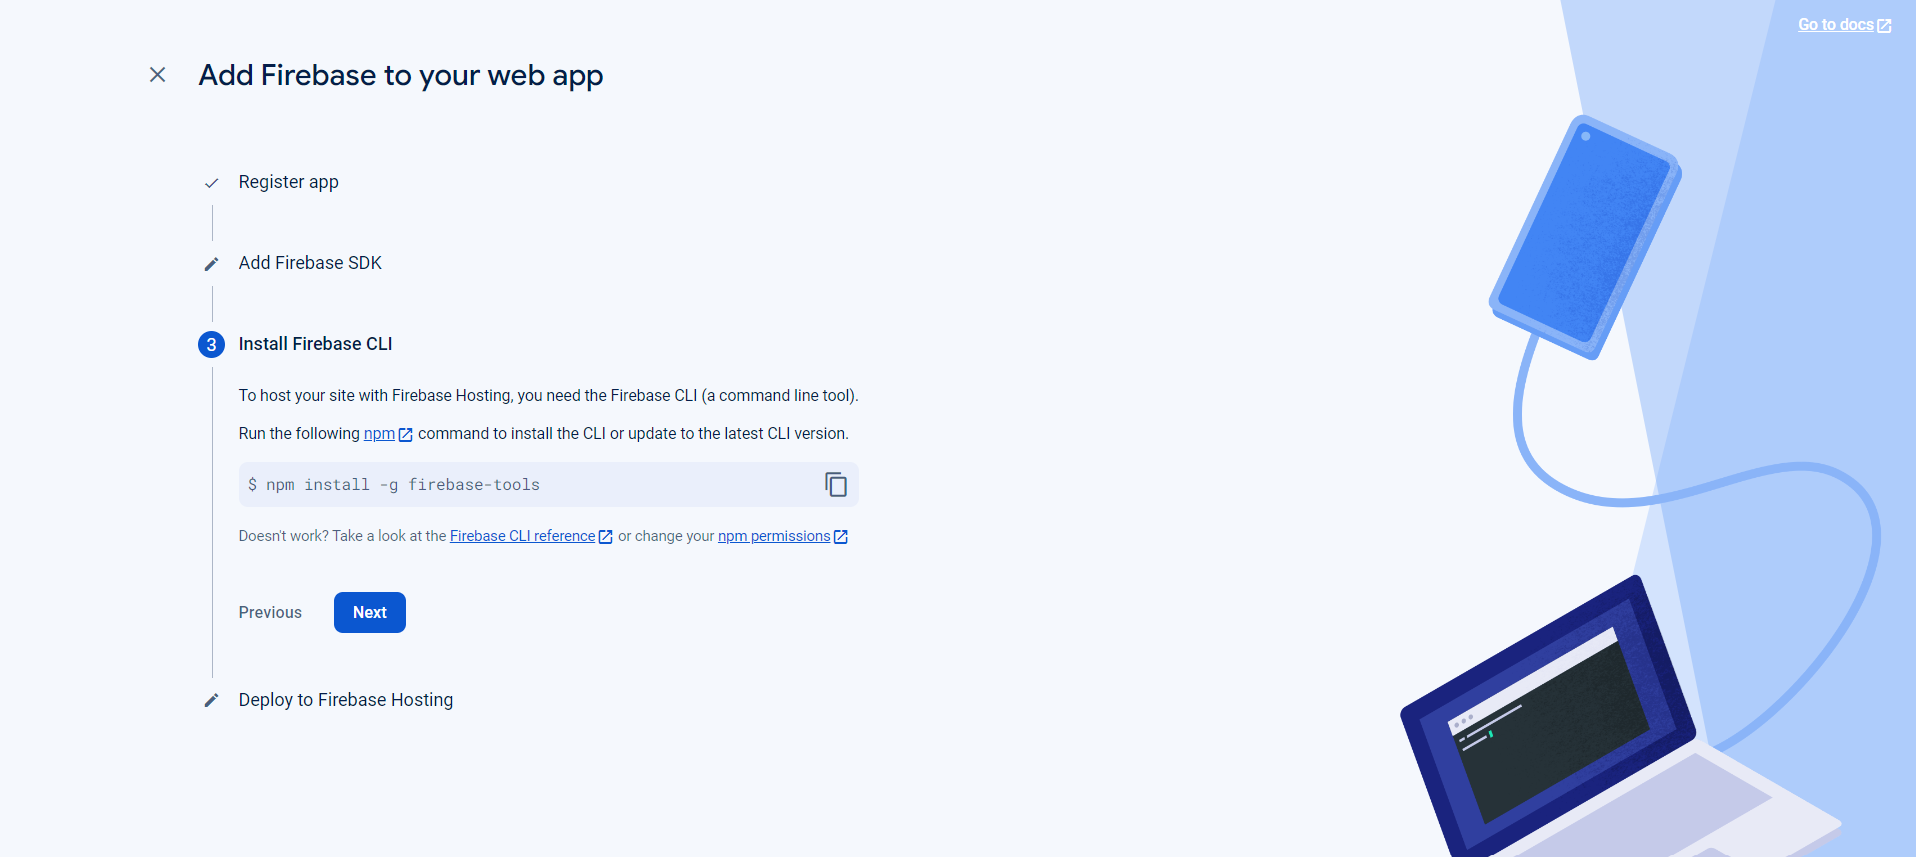
Step 4: Install Firebase CLI
To host your site with Firebase Hosting, you need the Firebase CLI (a command line Interface tool).
Run the following npm command to install the CLI or update to the latest CLI version.
npm install -g firebase-toolshere is a guide to take a look at the Firebase CLI reference or change your npm permissions
After installation of firebase CLI click on Next button
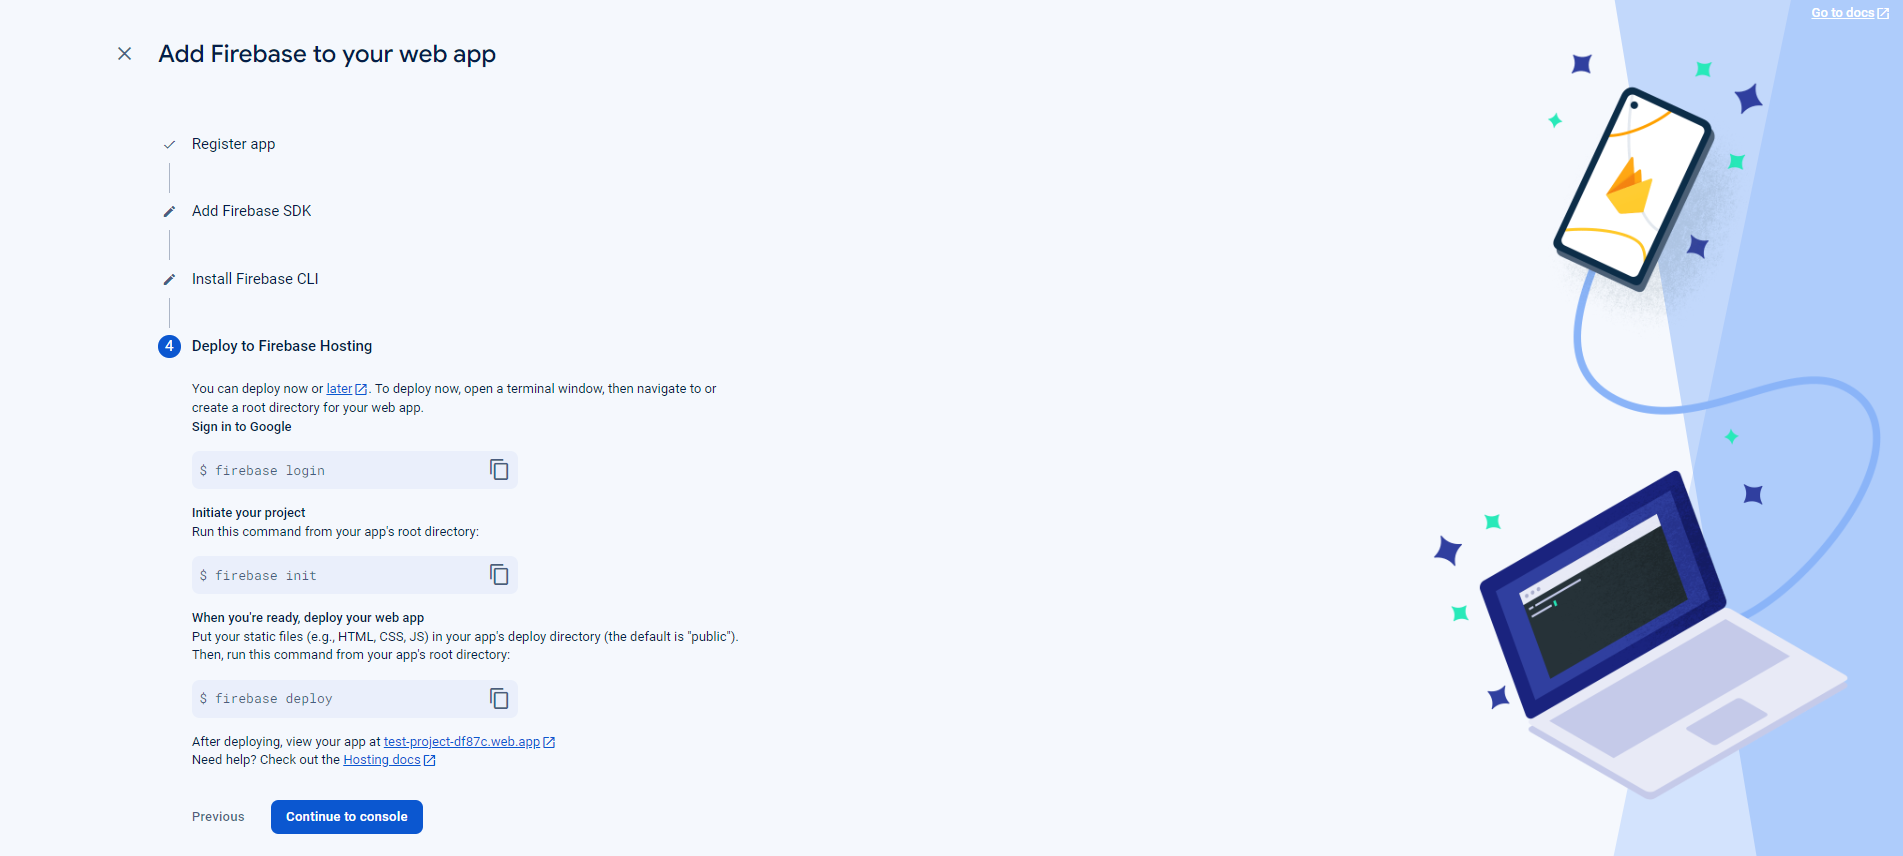
Step 5: Deploy the Firebase Hosting
In last step of adding Web app in to firebase, just there is a need to deploy the firebase hosting.
You can deploy now or later. To deploy now, open a terminal window, then navigate to or create a root directory for your web app.
Here are few steps to deploy the Firebase hosting
firebase login
firebase init
-
Put your static files (e.g., HTML, CSS, JS) in your app's deploy directory (the default is "public"). Then, run this command from your app's root directory:When you're ready, deploy your web app
firebase deploy
Click on “Continue to Console” button to finish the process
After deploying, view your app
Step 6: Installed Firebase to Web app
The app you added will appear in your project after installation.
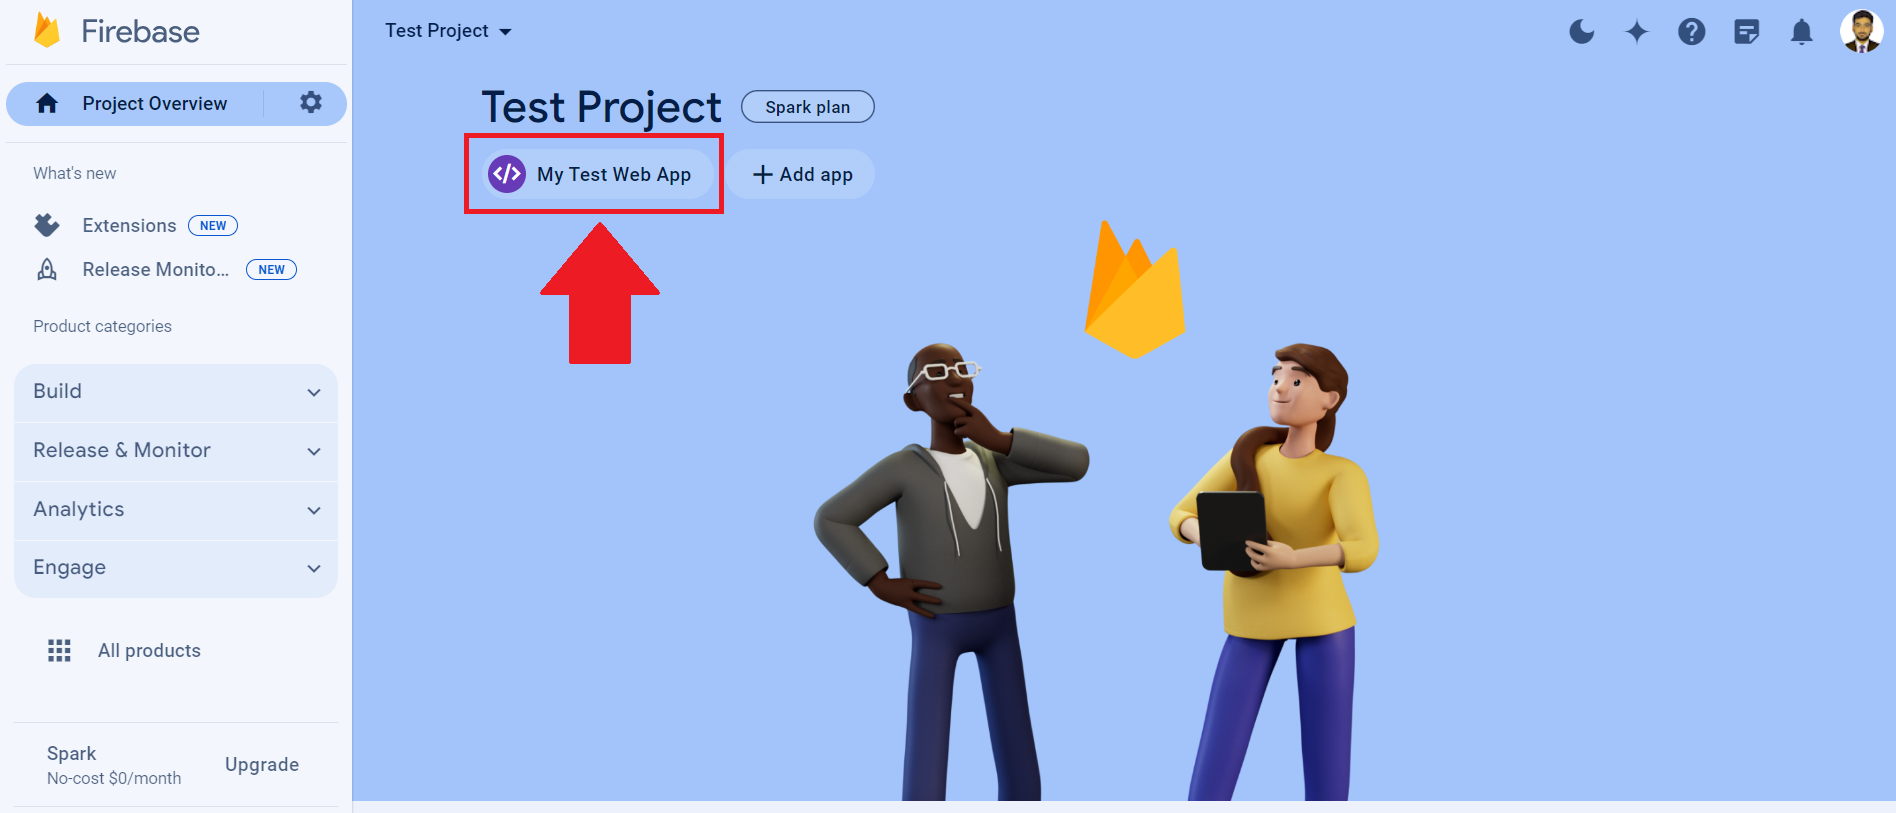
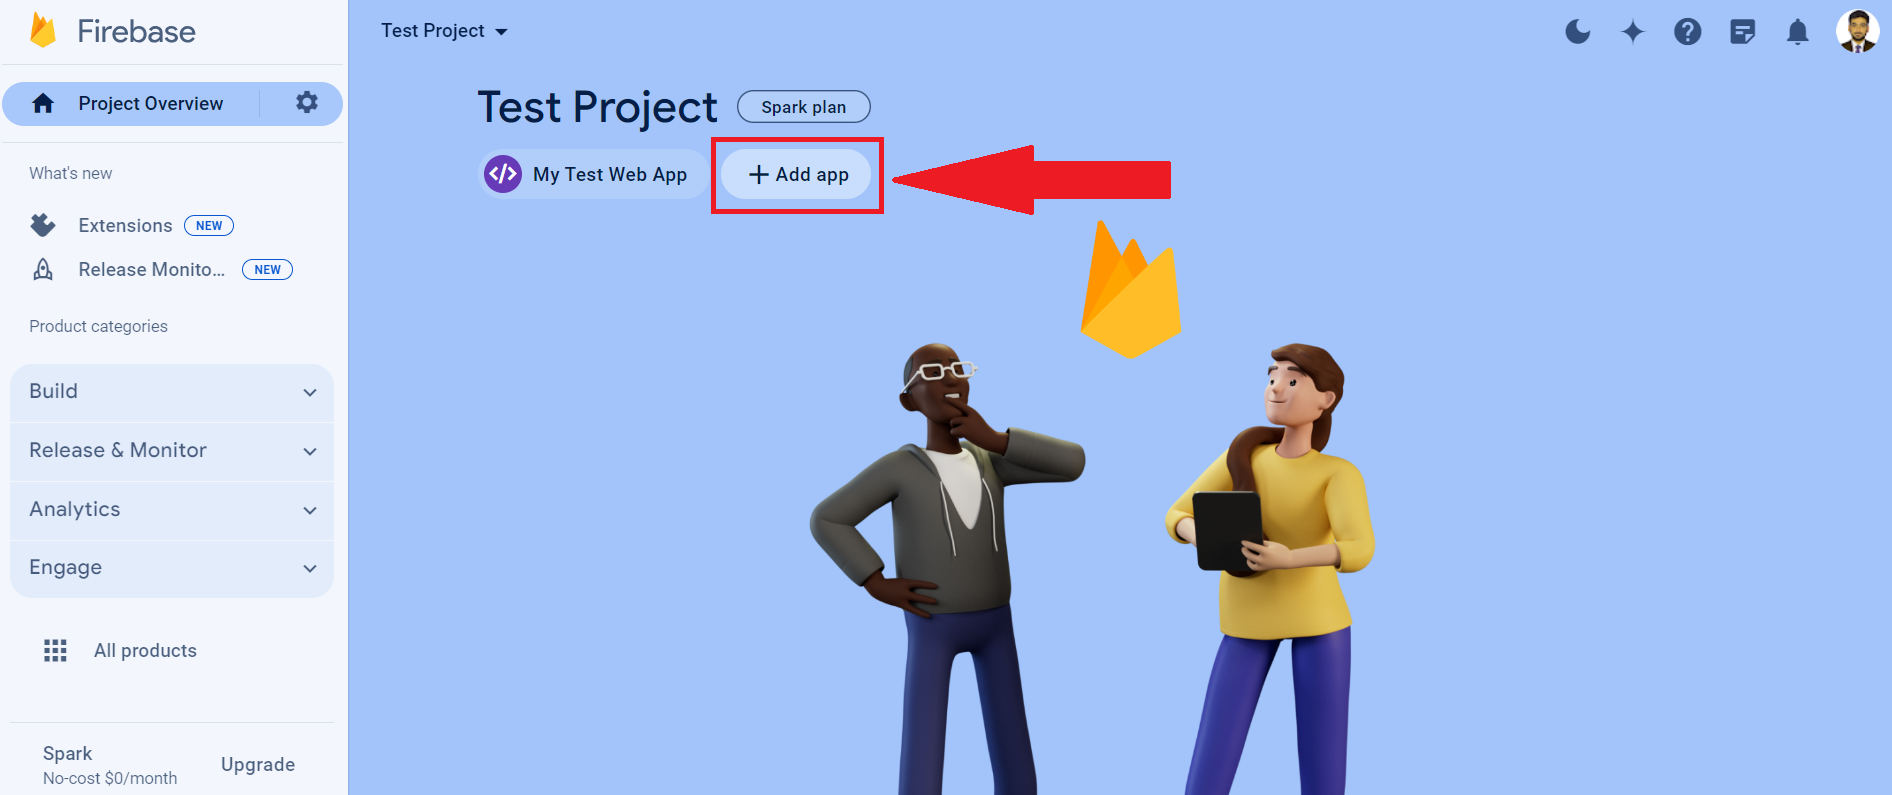
And there is also a provision to add multiple app in to the firebase. just click on the button “+Add App“ to add another app.
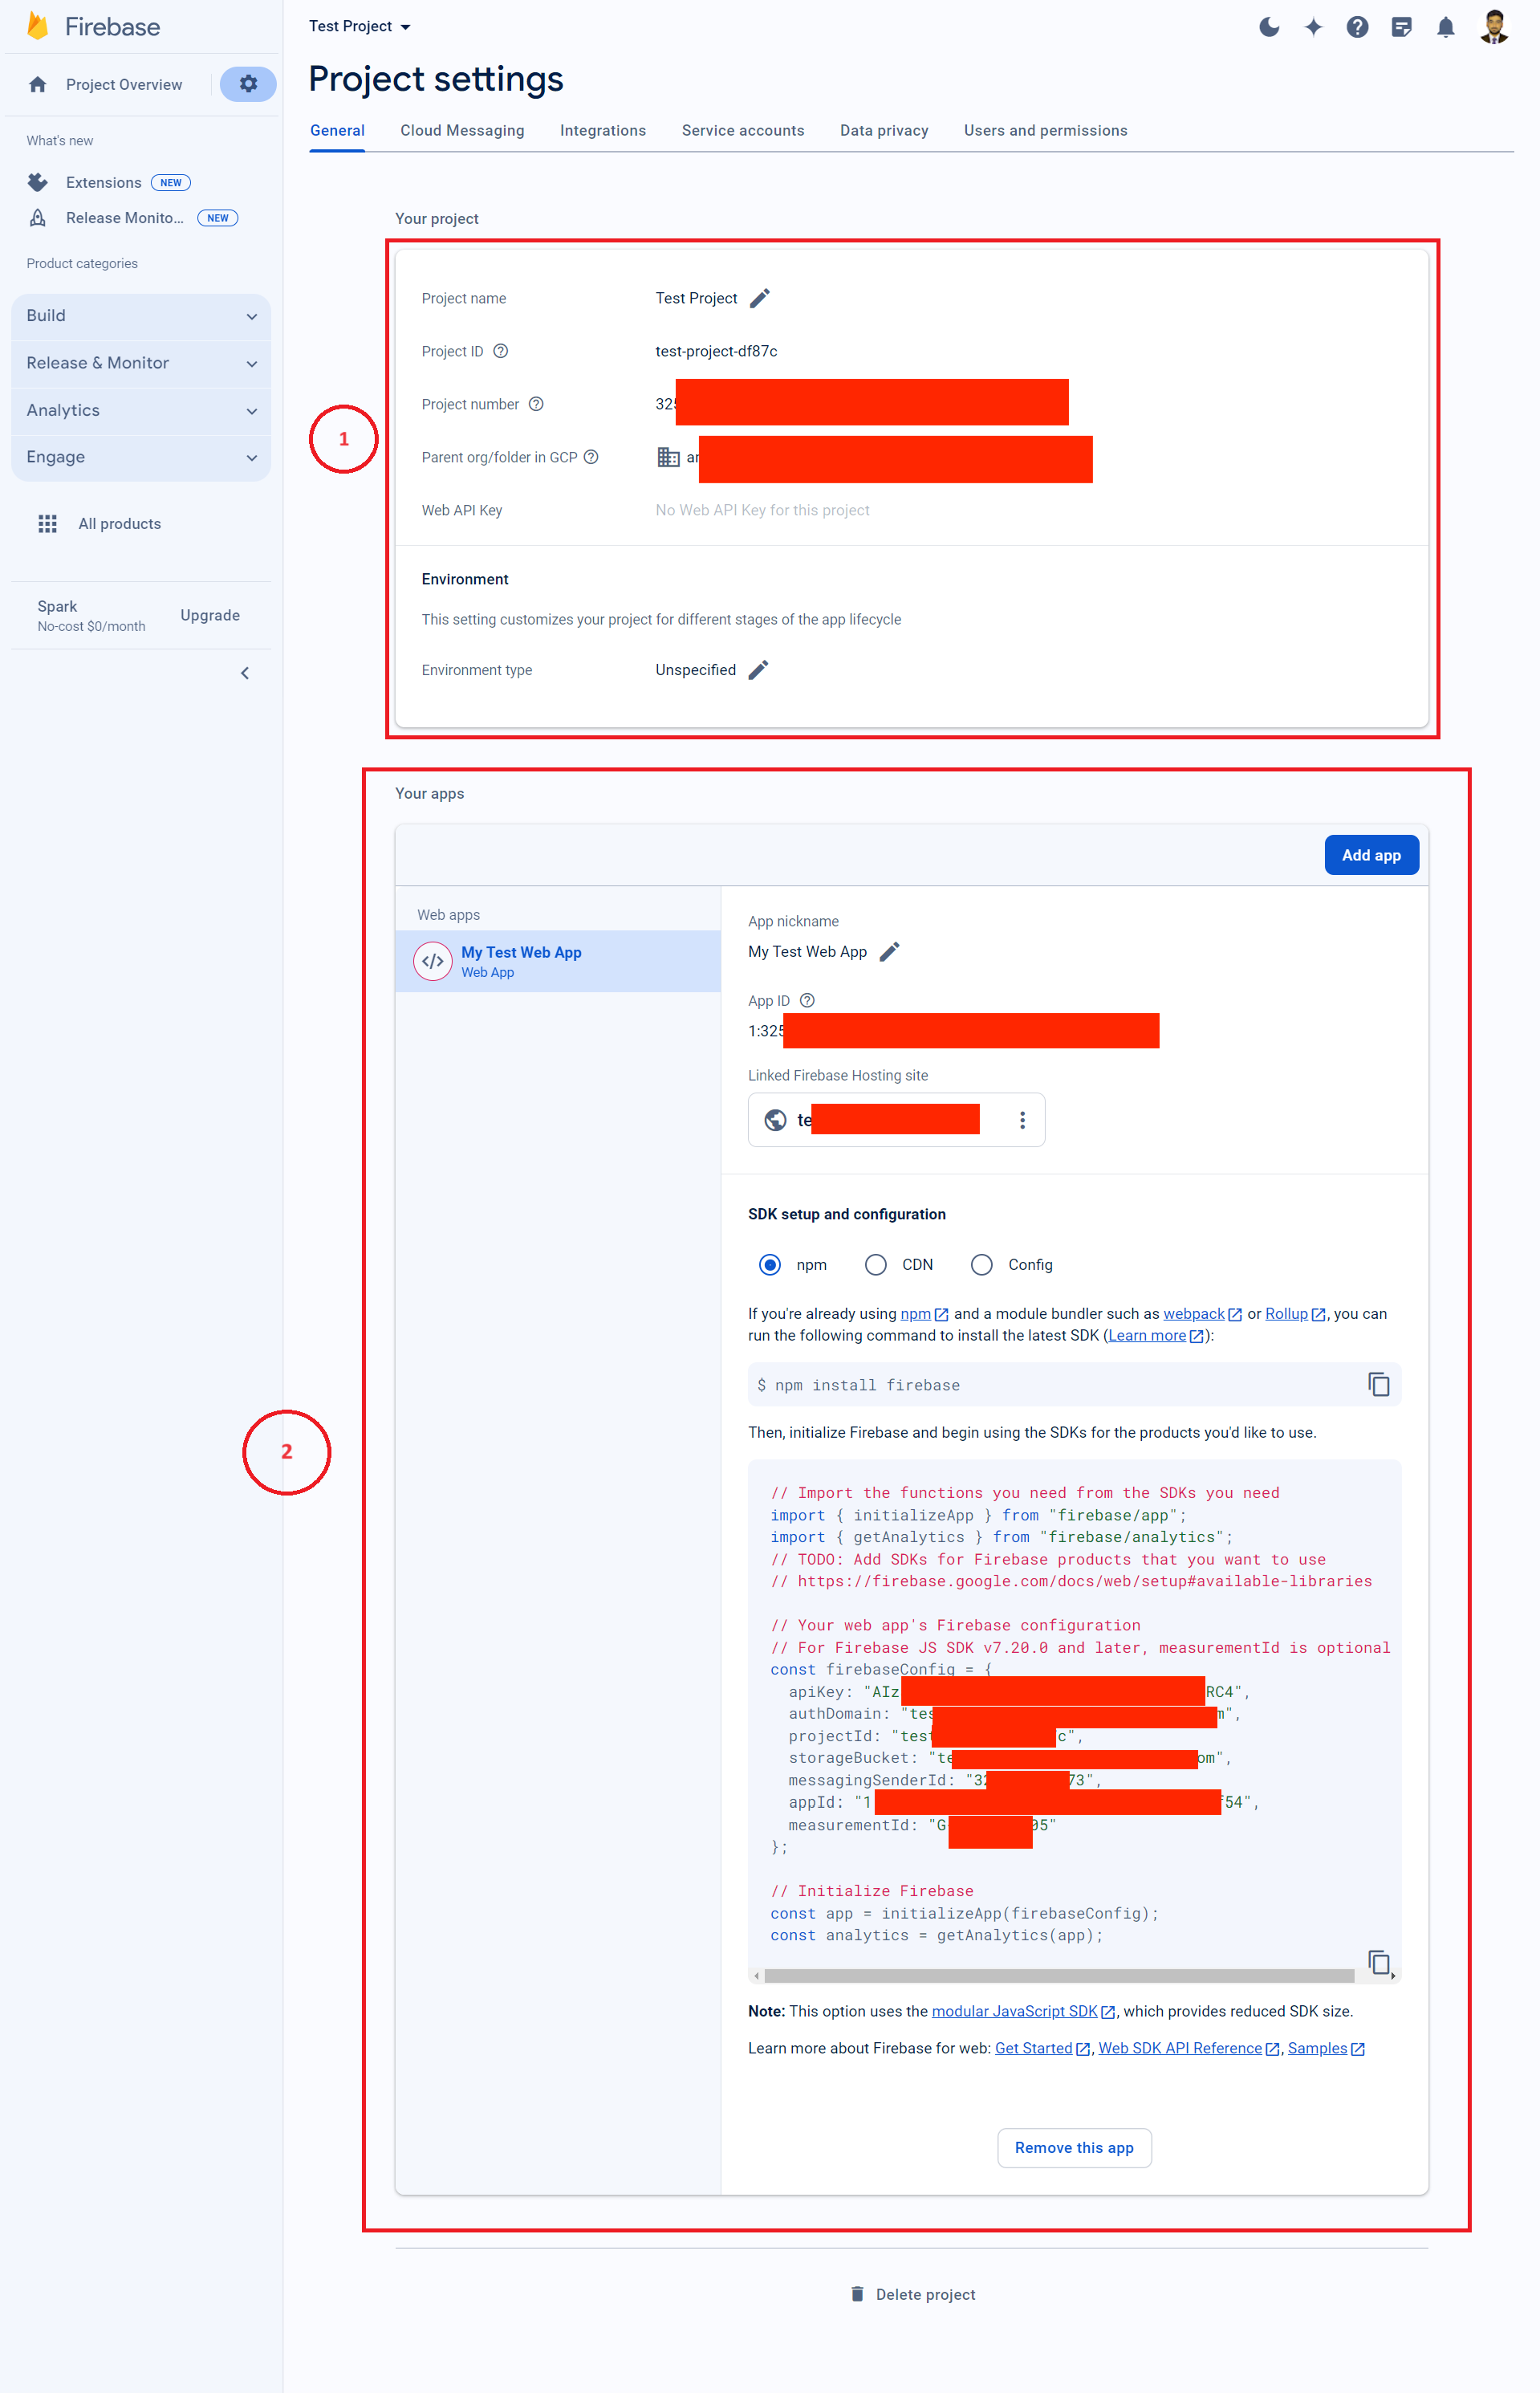
Project Settings
You can also check the settings of your project and app b clicking the Settings icon displayed on the Web app button.

Within the Project Settings, you'll find several sections. The primary ones include:
- Your Project
- This section displays comprehensive details about your Firebase project. It includes the project's name, public-facing name, project ID, and project number. It also shows linked resources such as Google Cloud Platform (GCP) resources.
- Analytics settings, Cloud Messaging settings, and other service-specific configurations are also part of this section. You can view and manage the integrations and behaviors of various Firebase services from here.
- Your App
- Under this section, you will see all the apps (Web, iOS, Android) linked to your Firebase project. Each app's configurations, including their App ID, Nickname, and Firebase SDK snippets for setup, are displayed here.
- App-specific settingssuch as SHA certificate fingerprints for Android apps, bundle IDs for iOS apps, and app URLs for web apps can also be managed in this section.
Managing and Removing Apps
If you need to make changes to an app's settings or remove an app from your Firebase project, you can do so within the "Your App" section:
- Modify App Settings: For minor changes like updating an app's nickname or adjusting app-specific configurations, you can easily make these edits directly within the app settings.
- Remove an App:
- To remove an app from your Firebase project, navigate to the specific app within the "Your App" section.
- Look for the option labeled “Remove this app.” Clicking this will initiate the process to delete the app from your Firebase project.
- You'll likely be prompted to confirm your decision. Removing an app is a significant action and cannot be undone. It will permanently delete all configurations, settings, and data associated with that app in Firebase.
It's important to review these settings regularly and understand the implications of any changes or removals, especially in production environments where such actions can impact your app's functionality and user experience. Managing your Firebase project and app settings effectively ensures that your application remains well-configured and secure, leveraging Firebase's capabilities to their fullest extent.
Related Links
For more information check out the documentation and explore sample Firebase apps:
- Get started: Add Firebase to your JavaScript project
- Web SDK API Reference: API Reference | Firebase JavaScript API reference
- Samples: Firebase Documentation
- Hosting Docs: Hosting docs