Push Notifications for Android
Overview
Setting up Firebase for your Android application is a smooth process that equips your project with a range of potent tools crafted to elevate app development and management. Firebase offers features like real-time databases, user authentication, analytics, and more, empowering you to efficiently build top-notch mobile apps without the hassle of managing backend code or servers. This guide will lead you through integrating Firebase into your Android application, starting from creating a Firebase project to integrating the necessary Firebase SDKs into your app.
By following this guide, you'll harness Firebase's capabilities to streamline your development process and enhance your app's functionality and user experience.
Before we dive into the step-by-step setup, let's ensure you meet the prerequisites. This setup will enable you to tap into Firebase's extensive features and uplift your Android development endeavors.
Prerequisites
Before you begin the integration process, certain preconditions need to be fulfilled:
- Signed In from Google Account: You must be signed into a Google account. This is necessary because Firebase services are tied to Google Cloud, and a Google account is required to access the Firebase console.
- Firebase Project Created on console.firebase.google.com: You need to have an active Firebase project. If you haven’t created one yet, you'll need to set up a new project in the Firebase console. This serves as the container for your app and its associated services.
- Google Analytics Enabled: Ensure that Google Analytics is enabled for your Firebase project. This is crucial for tracking user interactions and behaviors within your app, which helps in making data-driven improvements.
- Configured Google Analytics: Along with enabling Google Analytics, it should be properly configured to meet the specific needs of your app, such as setting user data privacy options and connecting it with other Google services if necessary.
Steps by Step Guide to Setup Firebase for Android
Following are the main steps to follow for the setup of firebase for android app
Step 1: Click on Android Icon
Open your project and click the android icon. Here is an icon of android to navigate to start the process of setting up firebase on android.

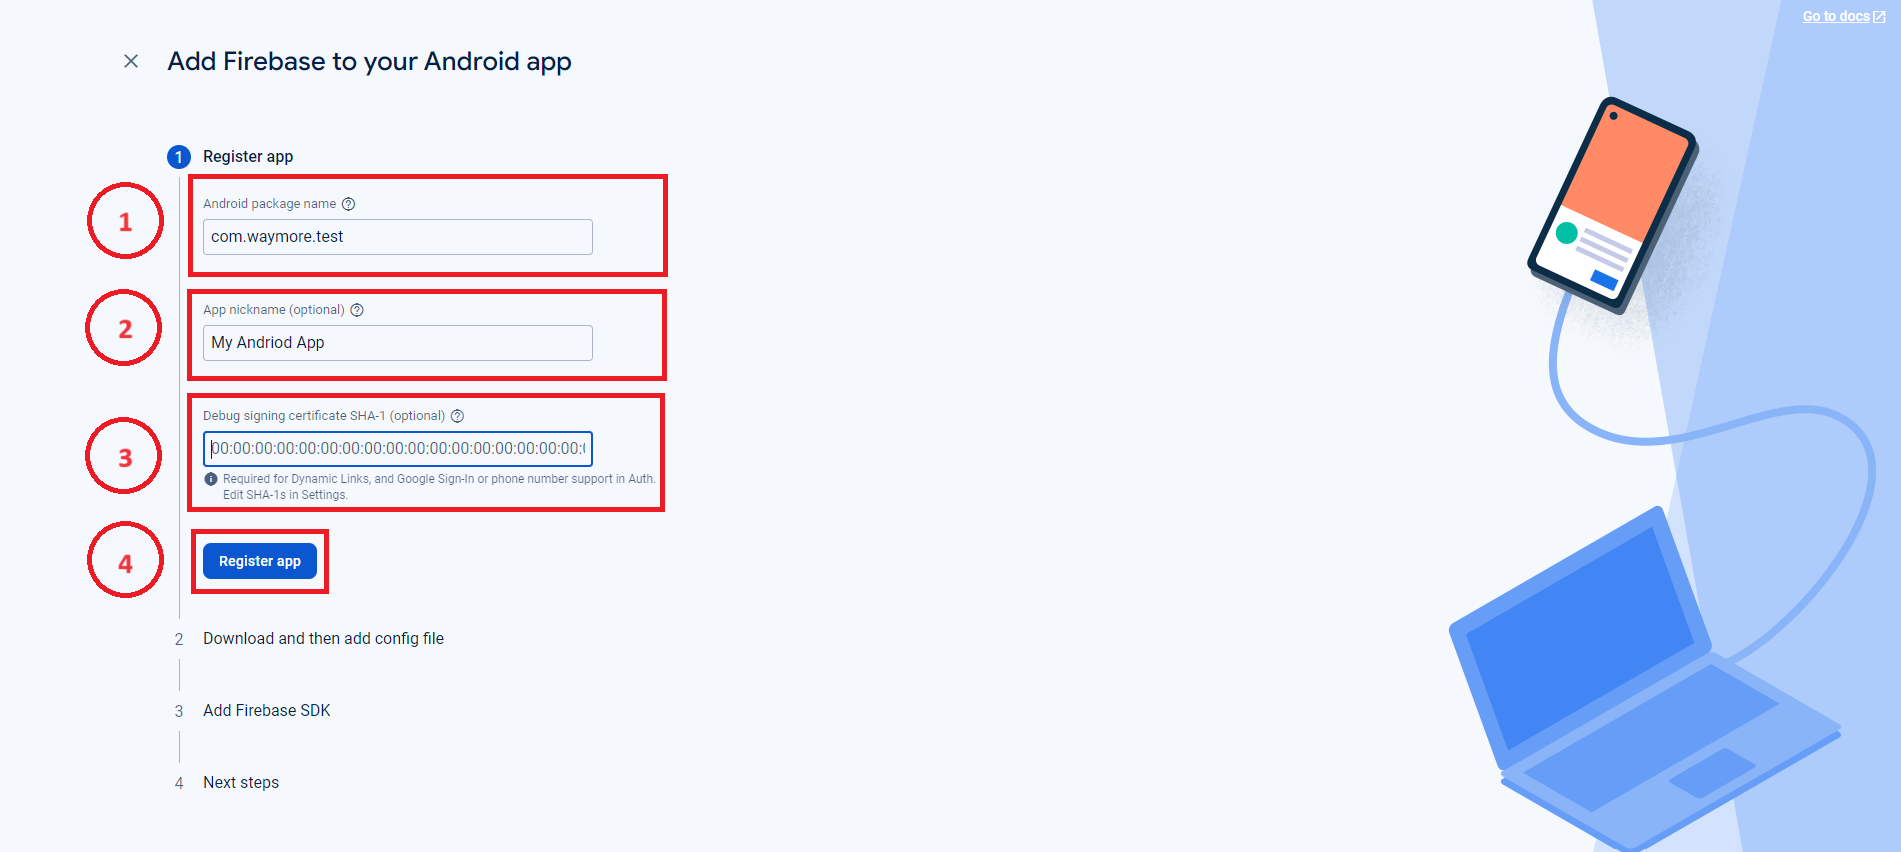
Step 2: Register App
In this step, you need to add the Android Package Name (e.g. com.waymore.test) and App Nick name which is optional. there is also another field “Debug signing certificate SHA-1“ which is optional and required for Dynamic Links, and Google Sign-In or phone number support in Auth.
After entering all the necessary information click on Register App button .
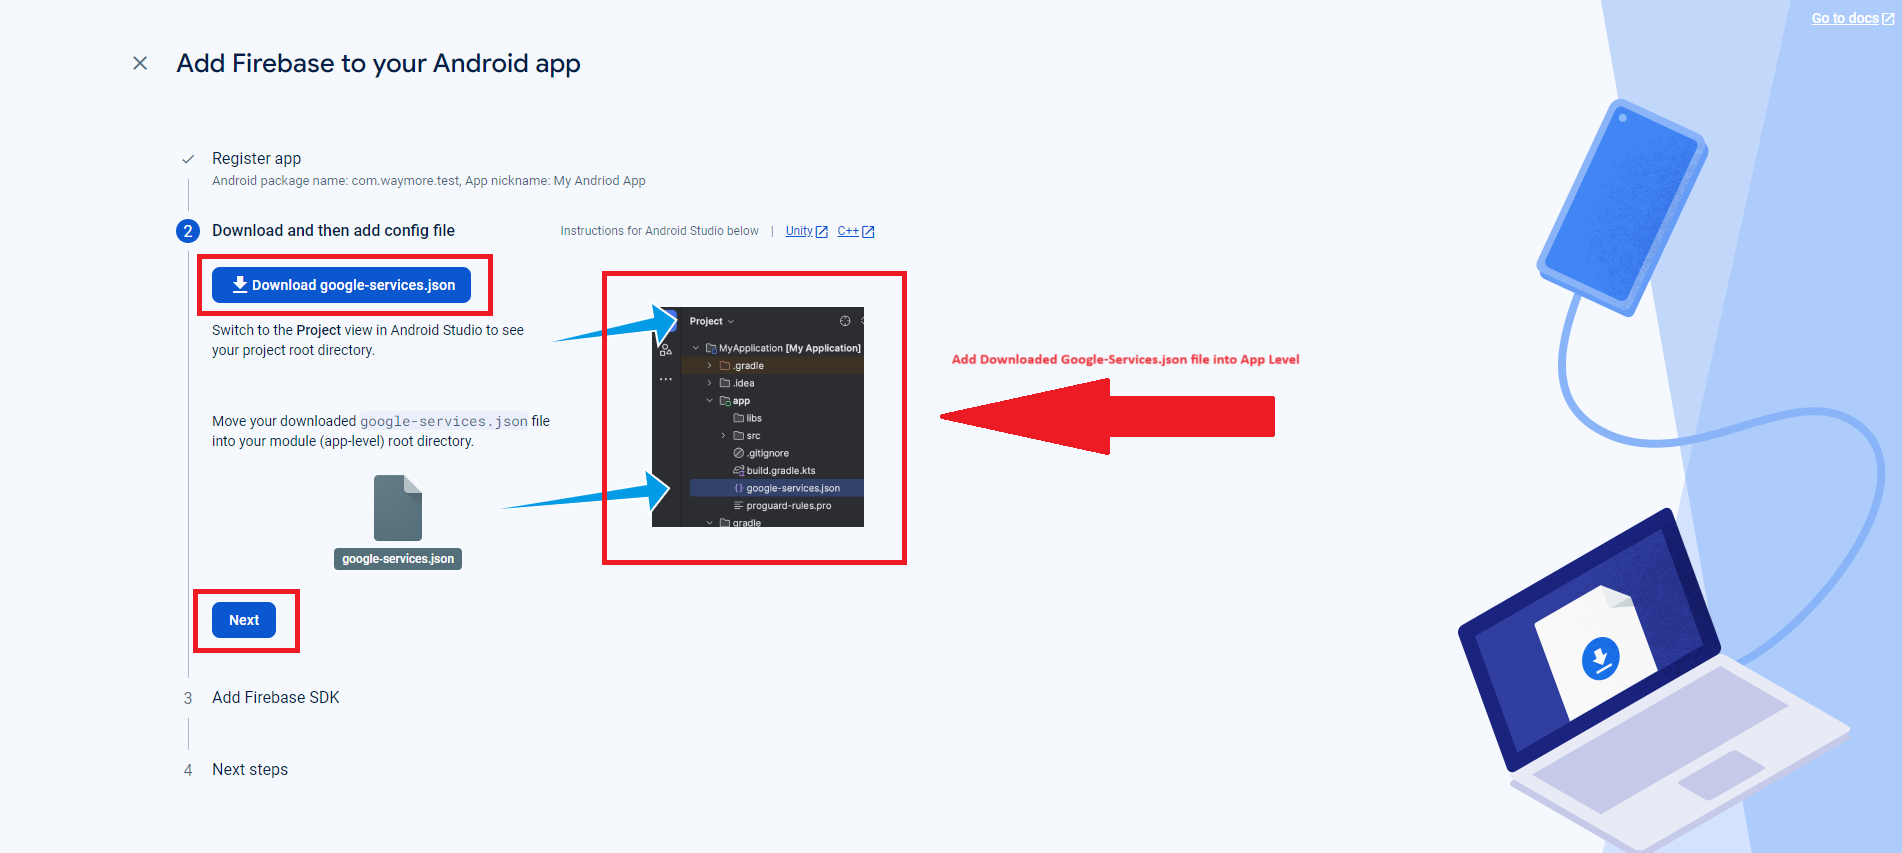
Step 3: Download and add Config File
Here you can download the config Google-Services.json file and Switch to the Project view in Android Studio to see your project root directory.
Move your downloaded google-services.json file into your module (app-level) root directory.
click on next Button
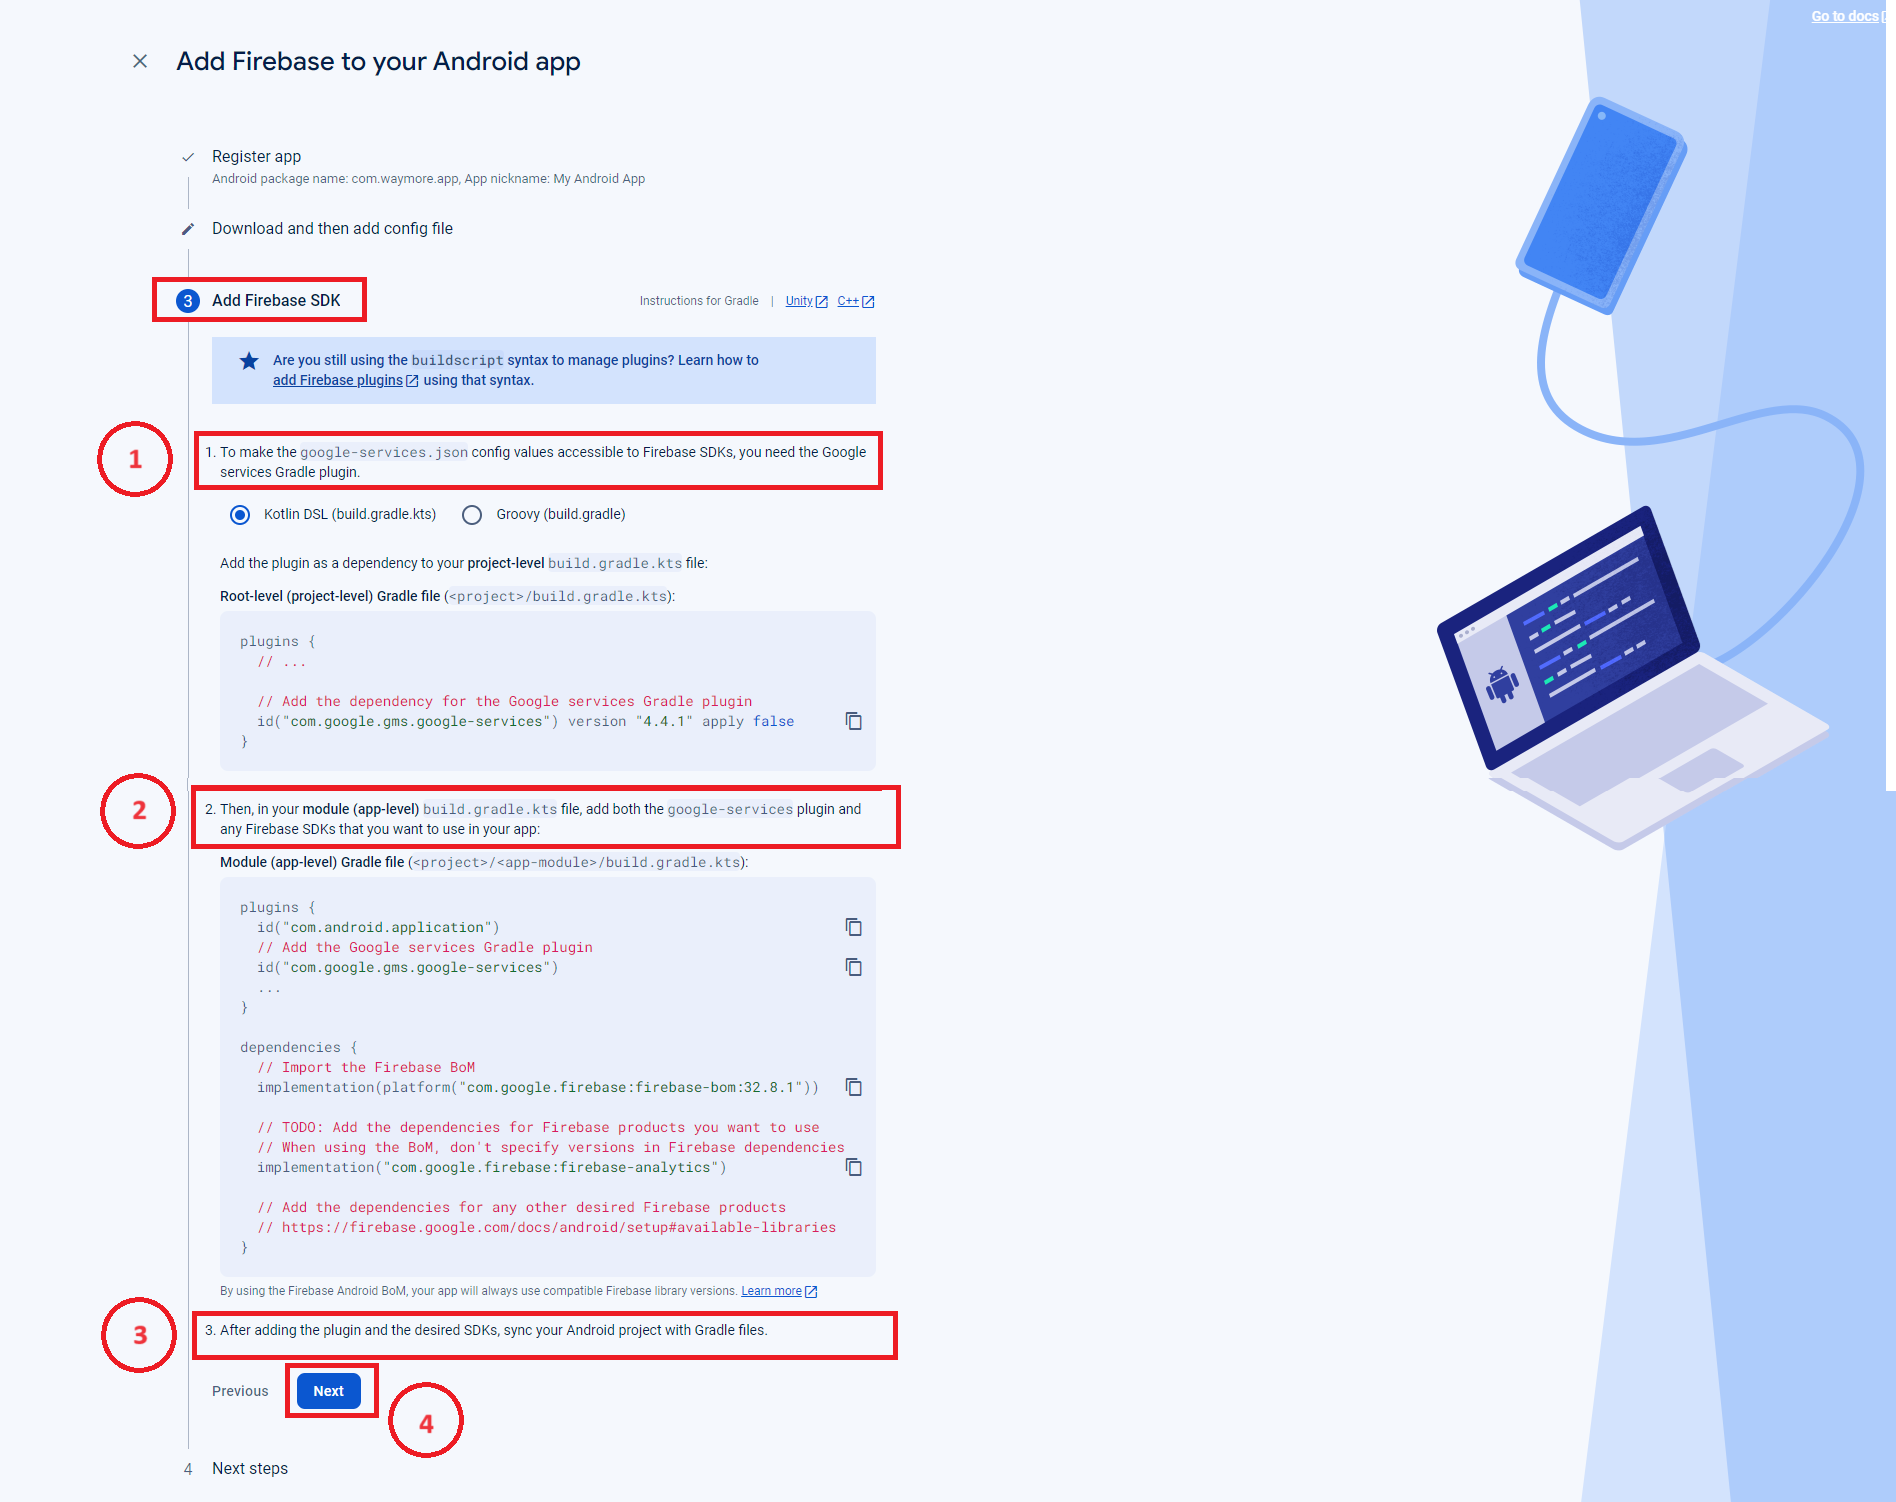
Step 4: Add Firebase SDK
For adding a firebase SDK you need to follow the below steps:
- To make the
google-services.jsonconfig values accessible to Firebase SDKs, you need the Google services Gradle plugin.
- Kotlin DSL
- Groovy
Add the plugin as a dependency to your project-level build.gradle.kts file:
Root-level (project-level) Gradle file (<project>/build.gradle.kts):
}
plugins {
// ...
// Add the dependency for the Google services Gradle plugin id("com.google.gms.google-services") version "4.4.1" apply false}
- Then, in your module (app-level)
build.gradle.ktsfile, add both thegoogle-servicesplugin and any Firebase SDKs that you want to use in your app:
- Module (app-level) Gradle file
<project>/<app-module>/build.gradle.kts
plugins {
id("com.android.application")
content_copy
// Add the Google services Gradle plugin
id("com.google.gms.google-services")
...
}
dependencies {
// Import the Firebase BoM
implementation(platform("com.google.firebase:firebase-bom:32.8.1"))
// TODO: Add the dependencies for Firebase products you want to use
// When using the BoM, don't specify versions in Firebase dependencies
implementation("com.google.firebase:firebase-analytics")
// Add the dependencies for any other desired Firebase products
//
}
By using the Firebase Android BoM, your app will always use compatible Firebase library versions.
- After adding the plugin and the desired SDKs, sync your Android project with Gradle files.
- And click on Next Button
Step 5: Continue to Console
In step 5 just you need to click on continue to console button. system will redirects to the firebase home screen from which the process was initiated. Here is the description displayed in this step
You're all set!
Make sure to check out the documentation to learn how to get started with each Firebase product that you want to use in your app.
You can also explore sample Firebase apps.
Or, continue to the console to explore Firebase.

Step 6: Installed Firebase to Web app
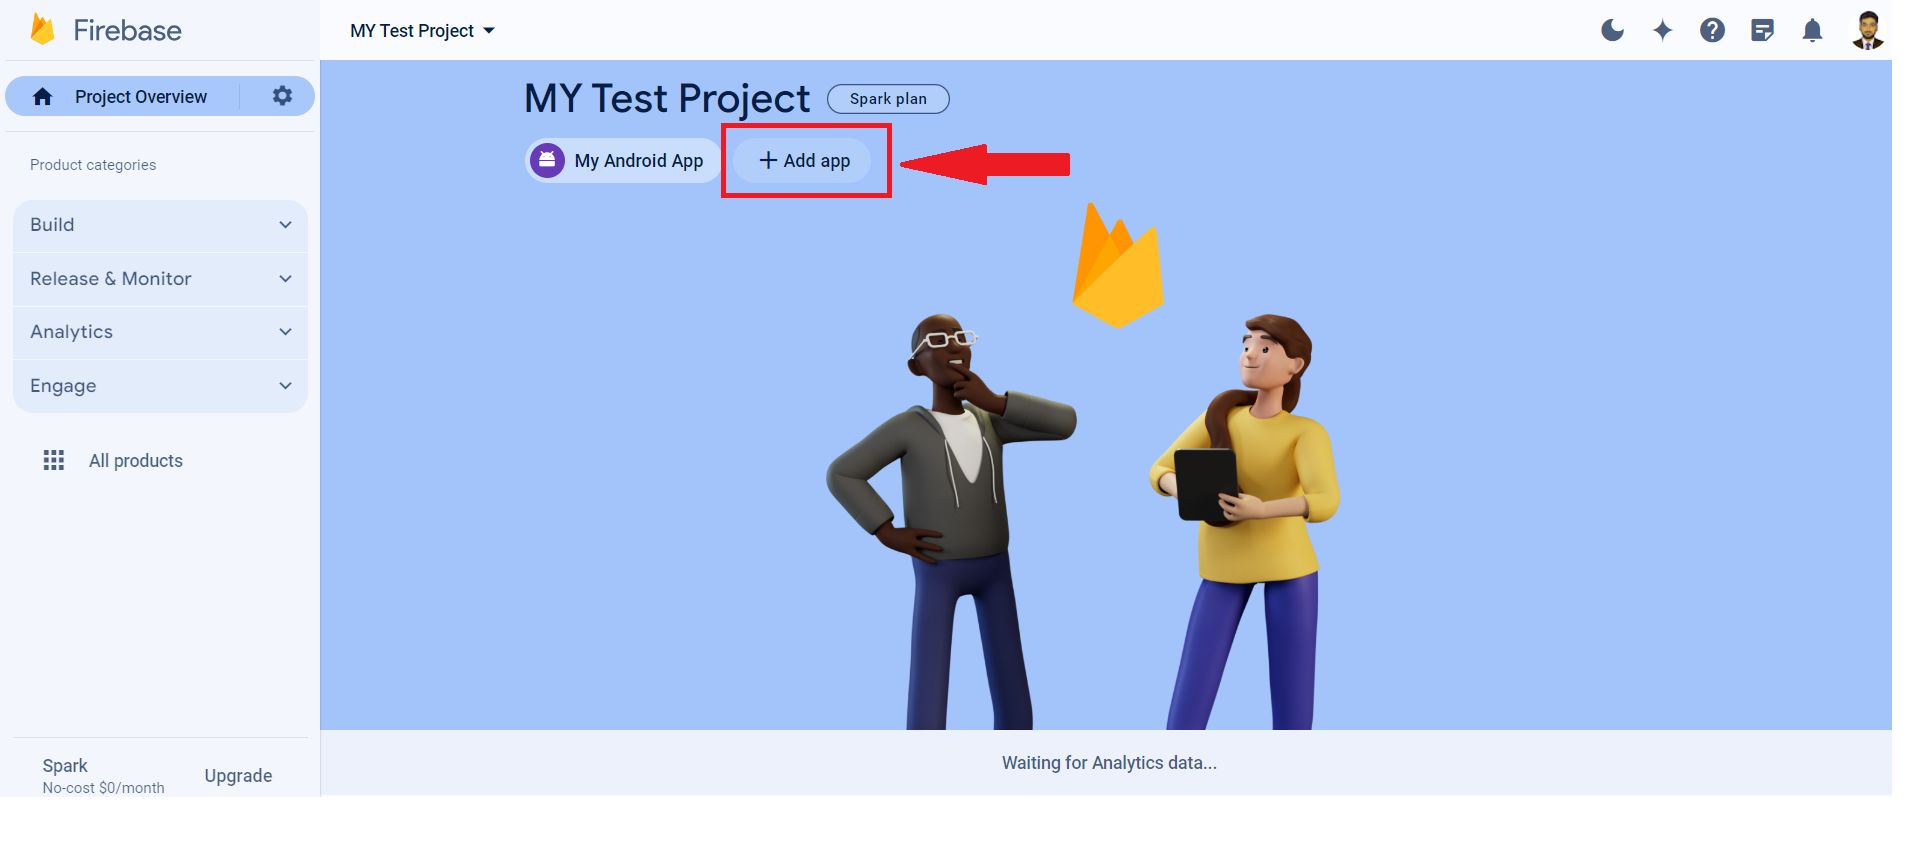
The app you added will appear in your project after installation.
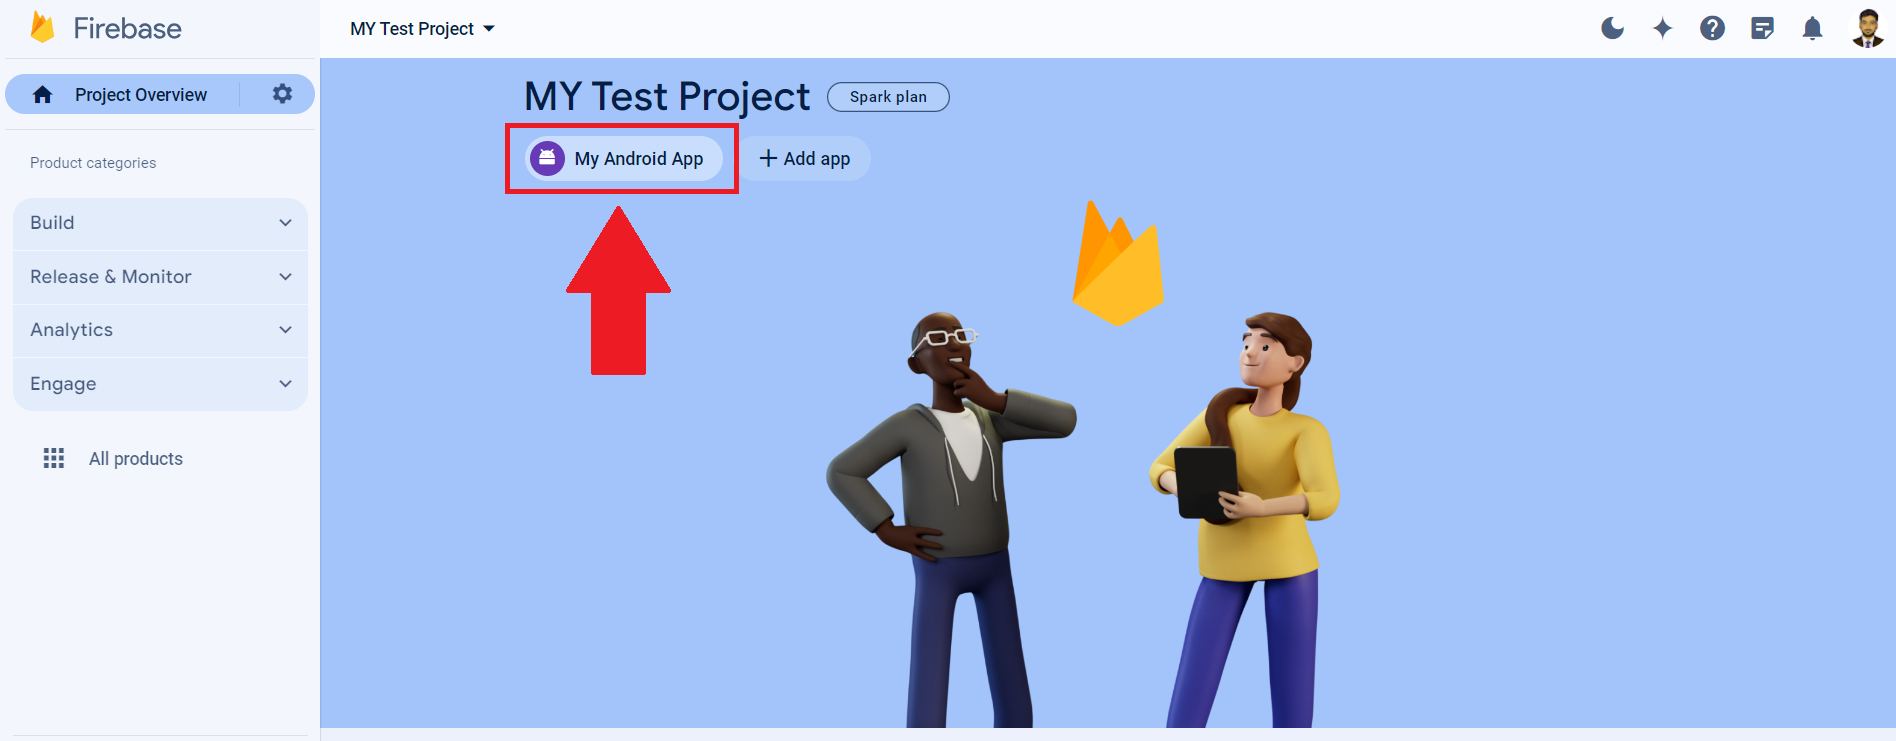
And there is also a provision to add multiple app in to the firebase. just click on the button “+Add App“ to add another android app.
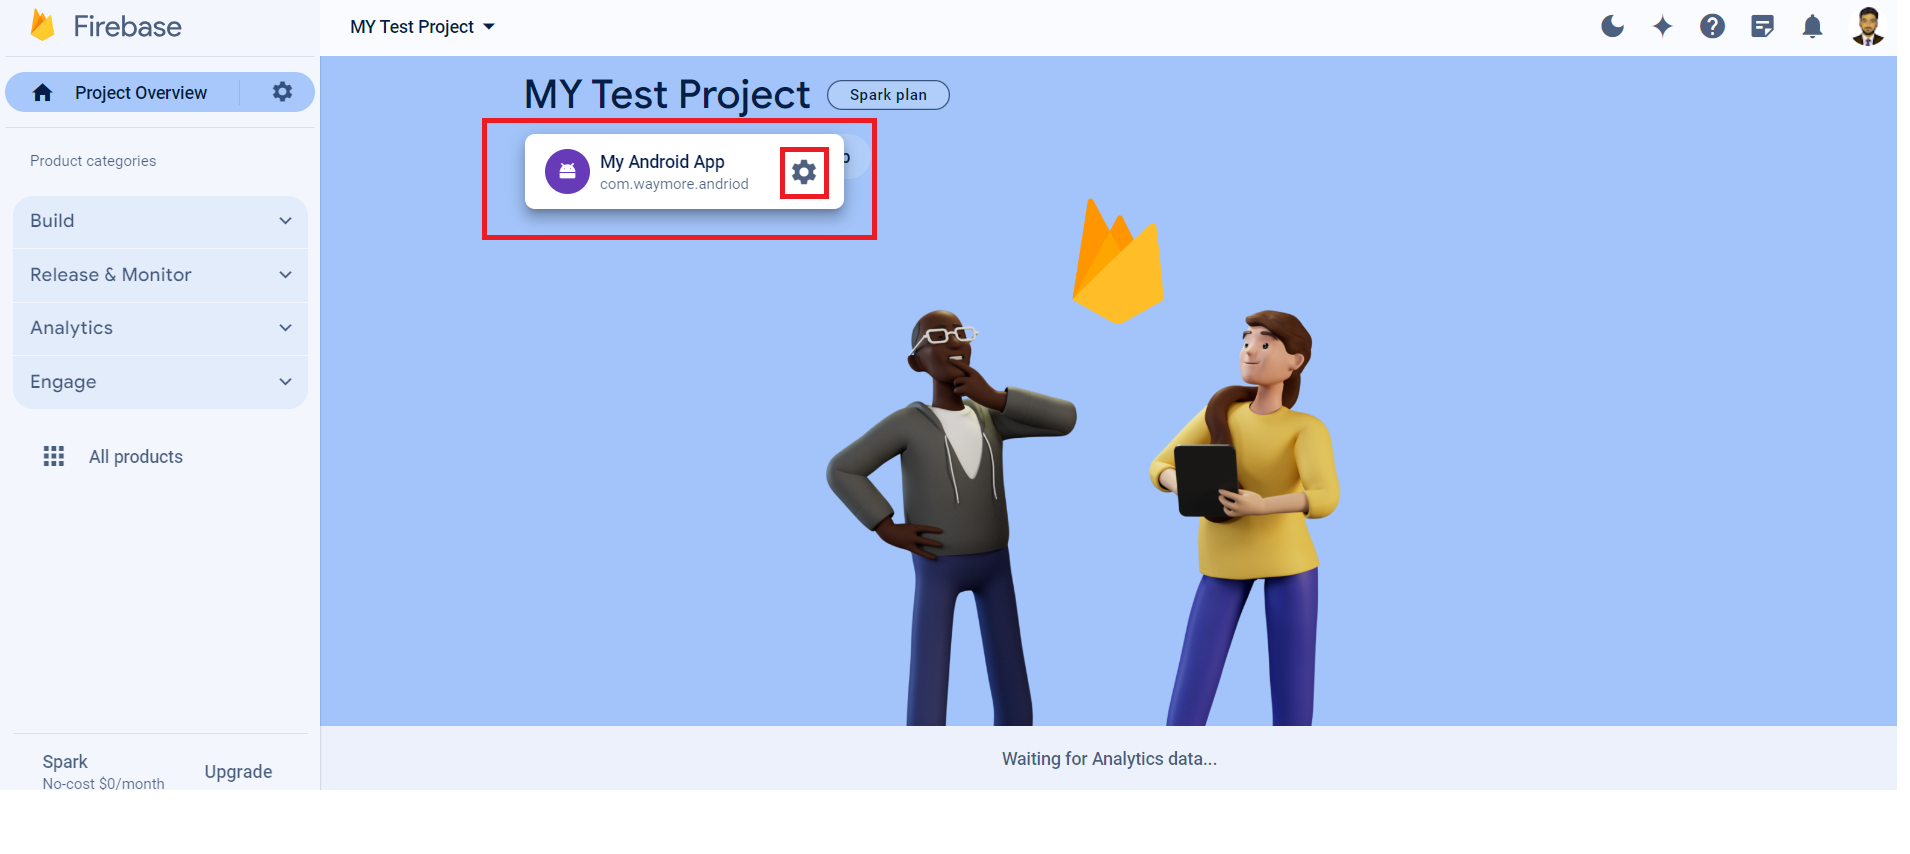
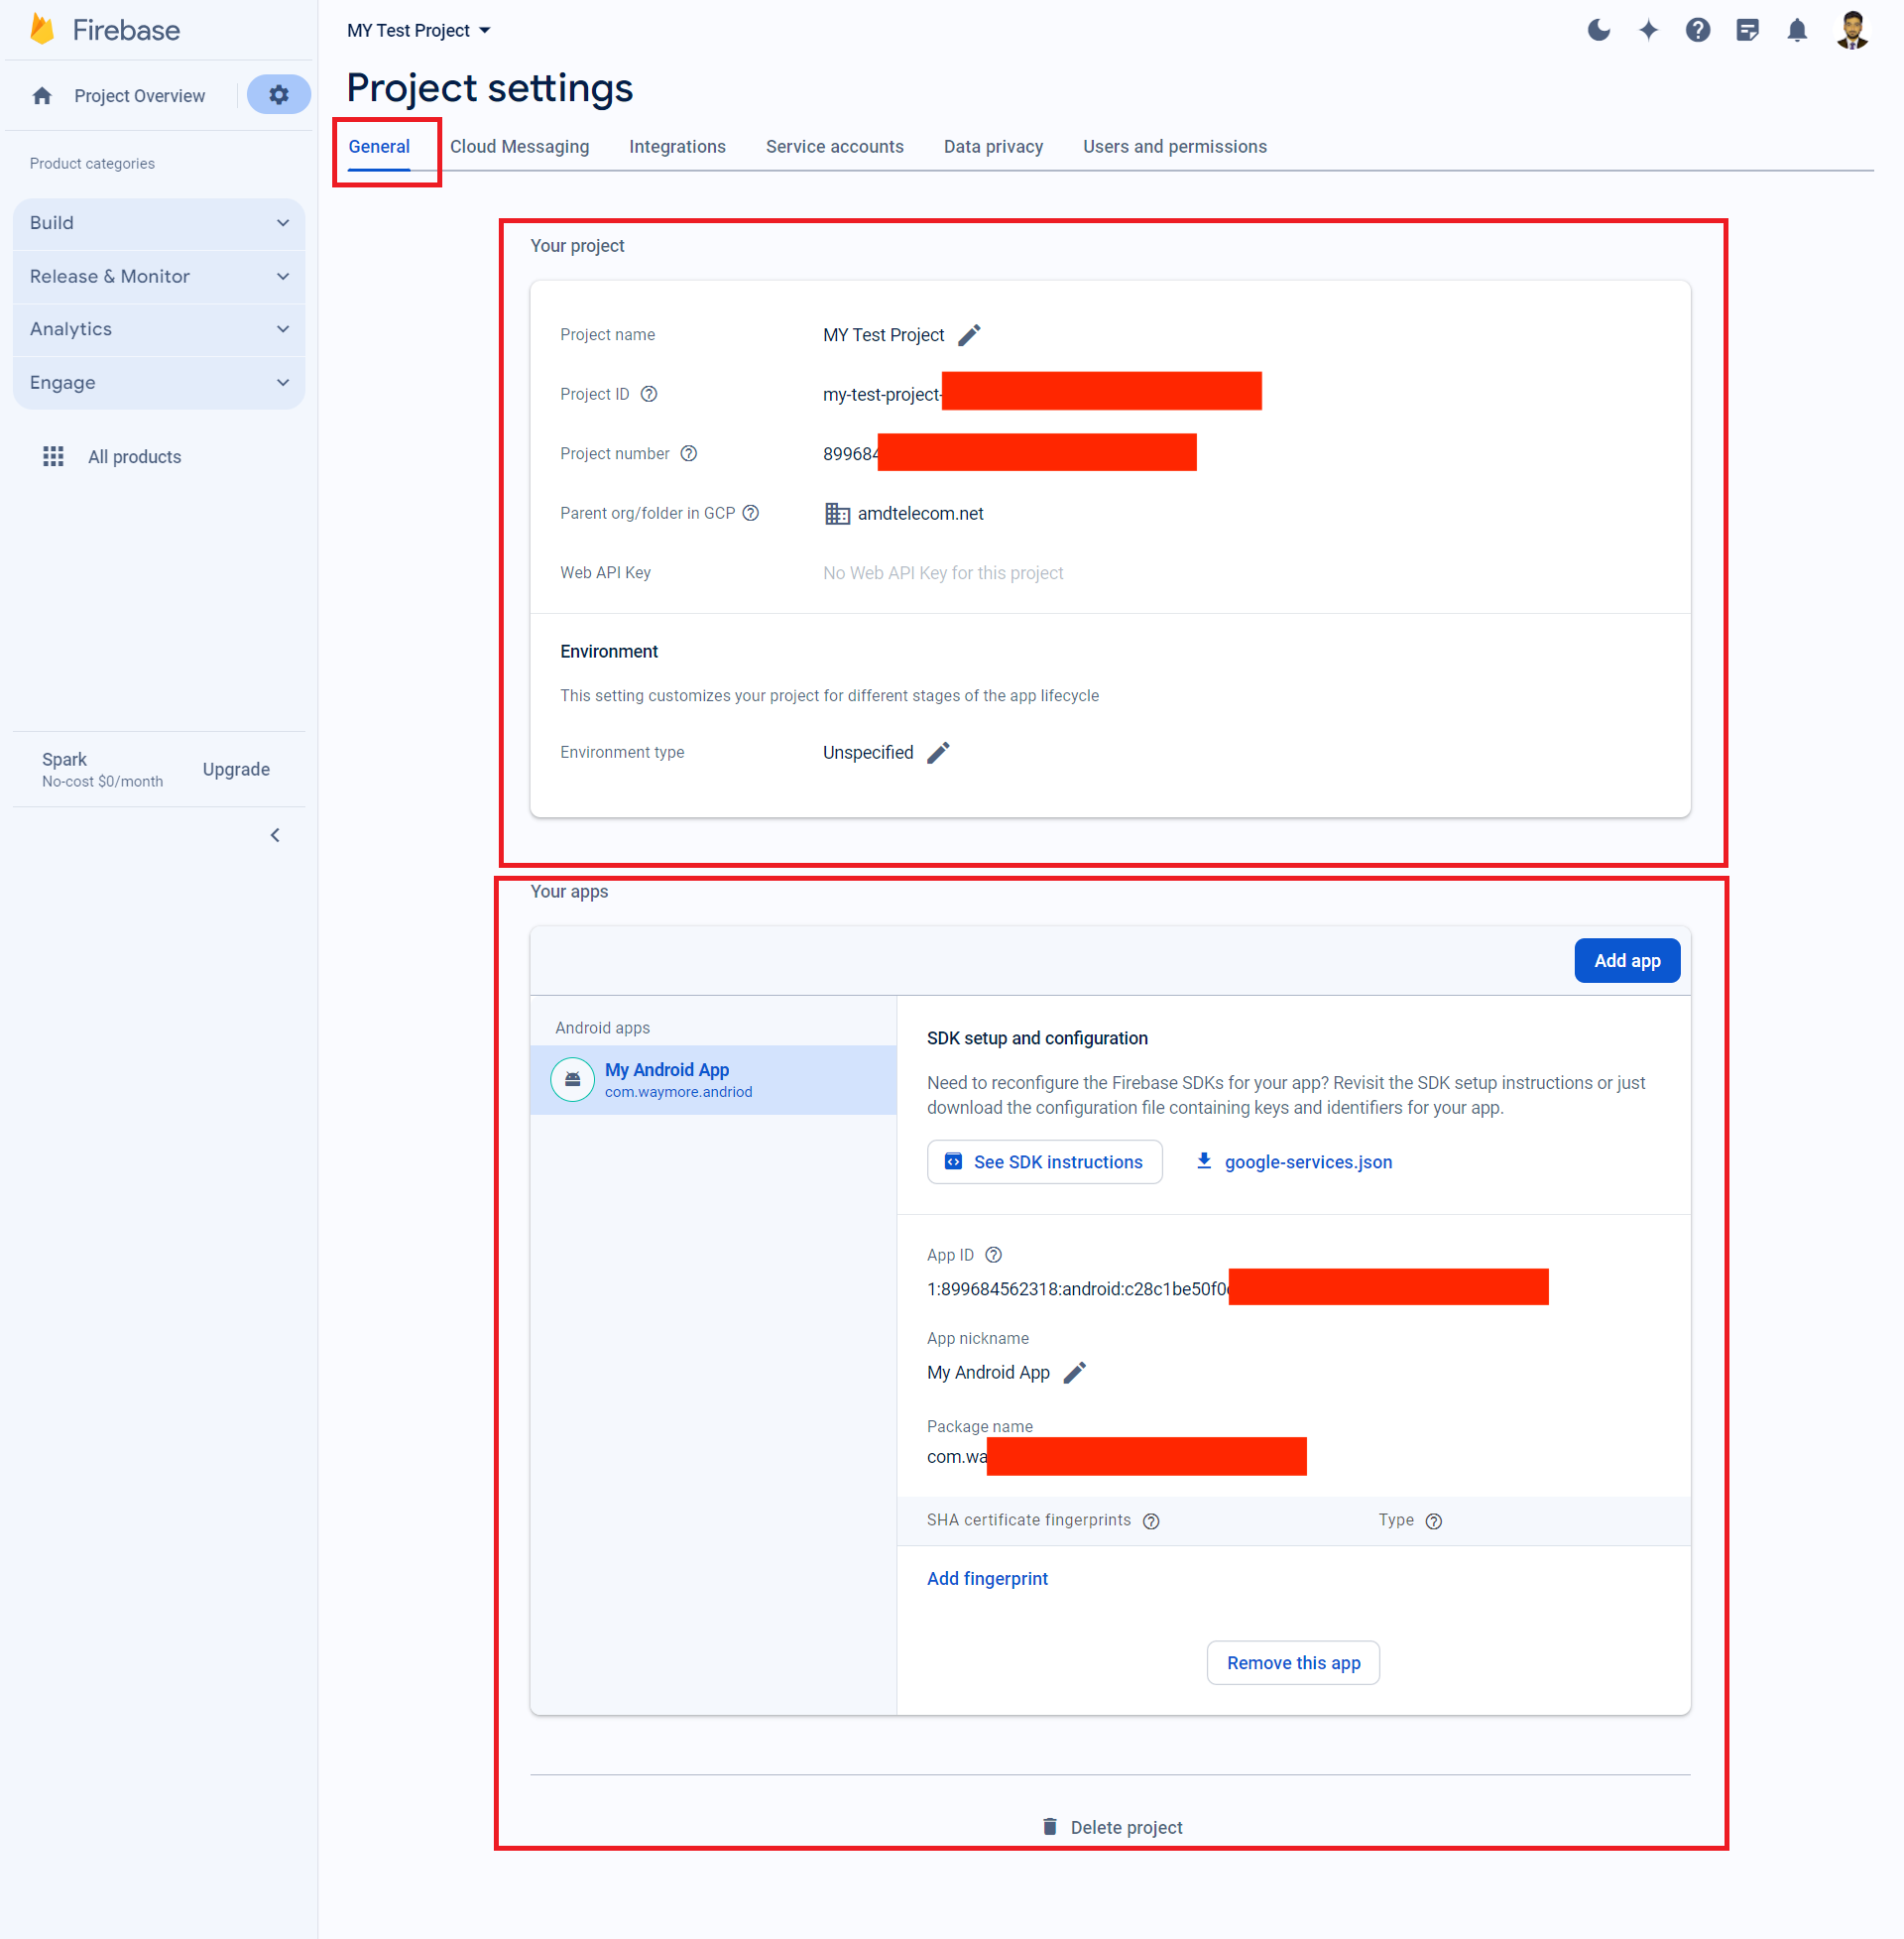
Project Settings
You can also check the settings of your project and app by clicking the Settings icon displayed on the android app button.
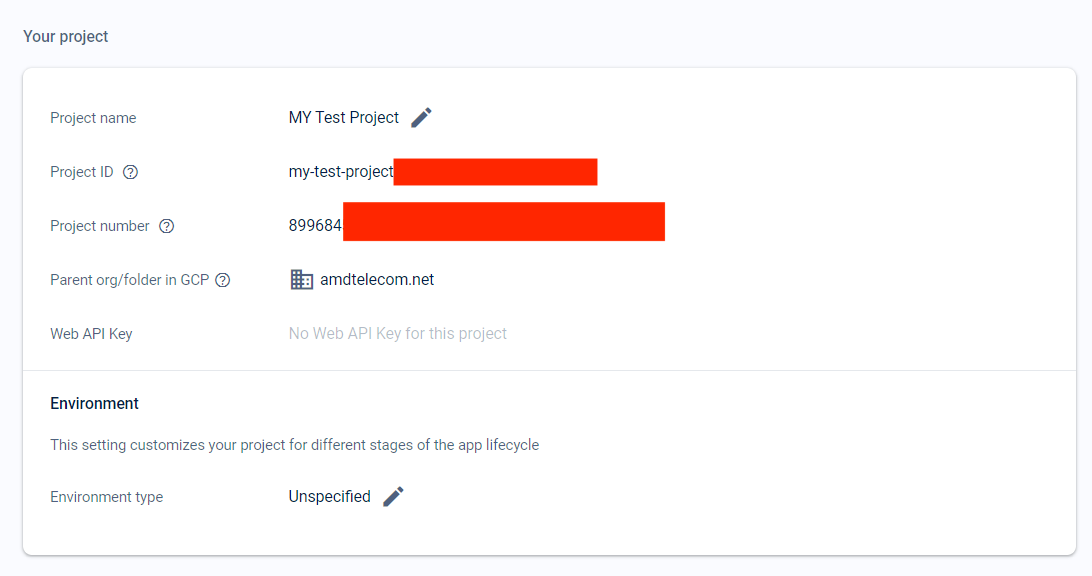
Within the Project Settings, you'll find several sections. Lets discuss primary section which is General. General Settings includes:
Your Project This section displays comprehensive details about your Firebase project. It includes the
- Project name
- Project ID
- Project number
- Parent org/folder in GCP
- Web API Key
- Environment Type
Your App
- Under this section, you will see all the apps (Web, iOS, Android) linked to your Firebase project. Each app's configurations, including their App ID, App Nickname, Package Name and Firebase SDK snippets for setup, are displayed here.
- App-specific settings such as SHA certificate fingerprints for Android apps, bundle IDs for iOS apps, and app URLs for web apps can also be managed in this section.
Managing and Removing Apps
If you need to make changes to an app's settings or remove an app from your Firebase project, you can do so within the "Your App" section:
- Modify App Settings
For minor changes like updating an app's nickname or adjusting app-specific configurations, you can easily make these edits directly within the app settings.
- Add App
there is also a button of Add App to add a new android app. Upon clicking, the process of adding a new app will started from step 1 as discussed above in detail.
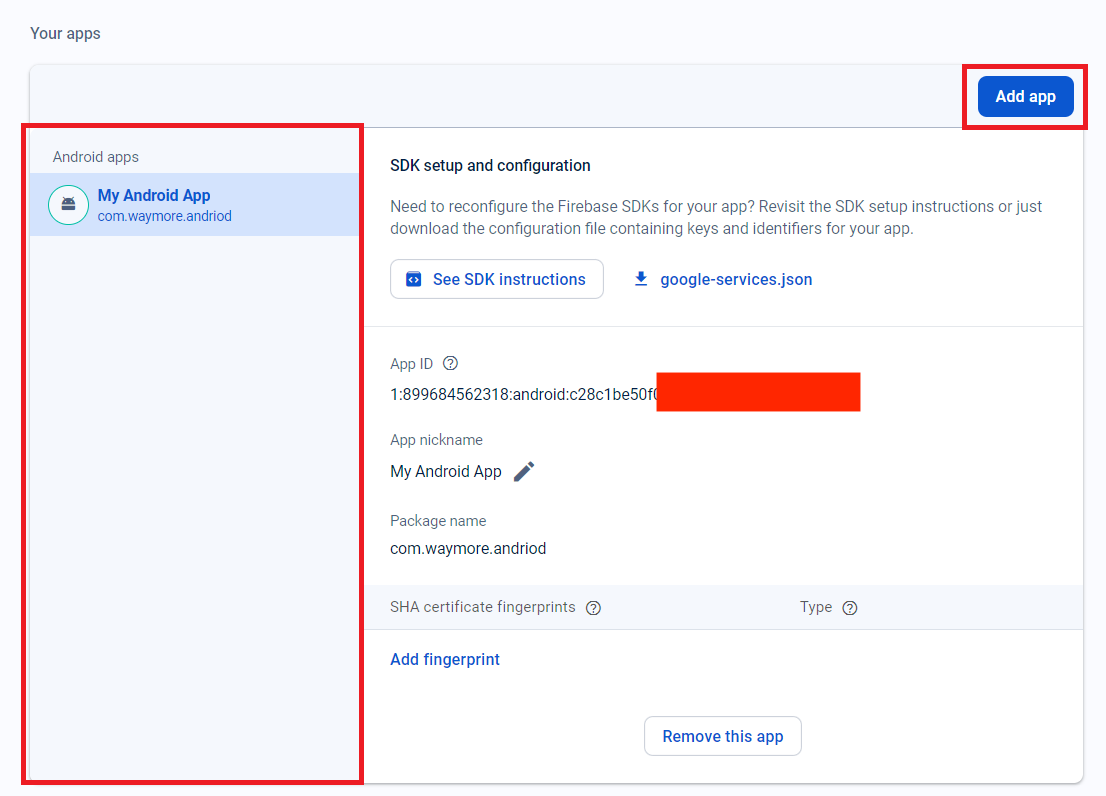
- Remove an App
To remove an android app from your Firebase project, navigate to the specific app within the "Your App" section.
Look for the option labeled “Remove this app.” Clicking this will initiate the process to delete the app from your Firebase project.
You'll likely be prompted to confirm your decision. Removing an app is a significant action and cannot be undone. It will permanently delete all configurations, settings, and data associated with that app in Firebase.
Related Links
For more information check out the documentation and explore sample Firebase apps:
- Get started: Add Firebase to your Android project | Firebase for Android
- Package Index Android: Package index | Firebase
- Samples: Firebase Documentation
- Hosting Docs: Hosting docs