Routee Application Settings
Use Routee's simple and elegant interface to enable or disable features of the API.
Info
Applications do not share settings. Each application has its unique configuration!
Application Settings##
For each application you can revoke its client tokens or change the secret.
You may need to revoke client tokens in order to force all clients to authenticate again for example, in case of a client system upgrade.
Applications other than the DEFAULT may also be deleted.
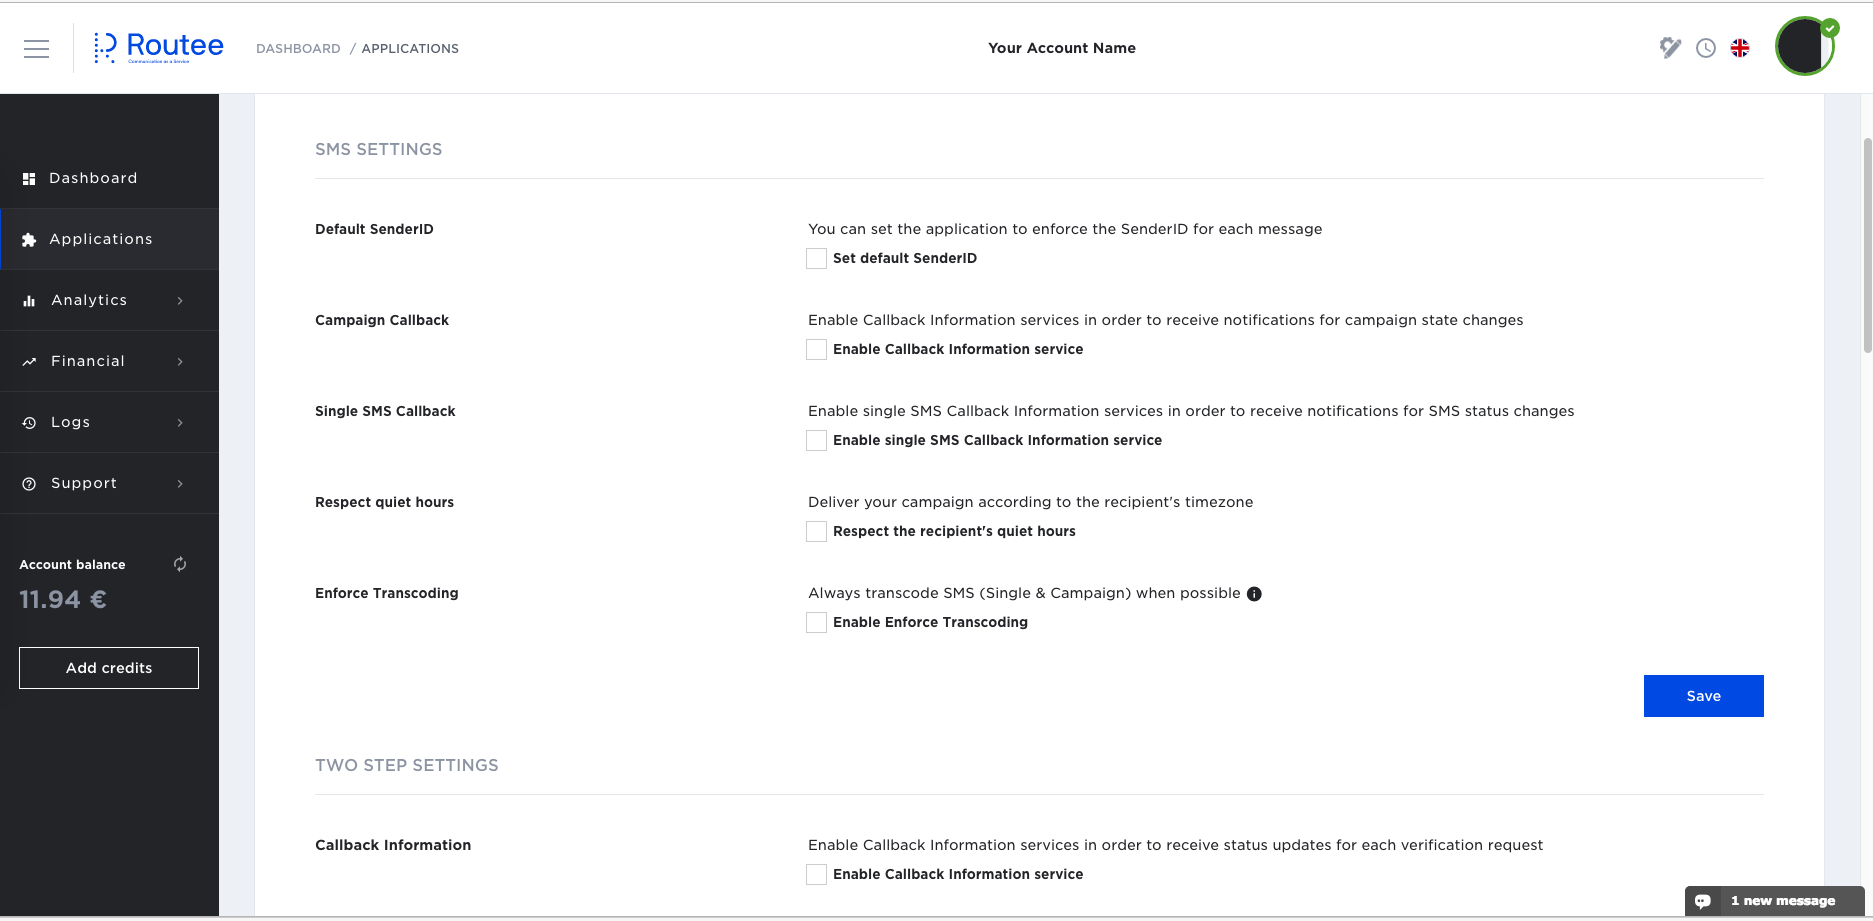
SMS Settings##

An overview of SMS service settings
Set default SenderID##
A SenderID describes the originator of the message. It is a combination of letters (a-z,A-Z), numbers (0-9) and spaces with a length up to 11 characters or a 16-digit number.
Messages may not be delivered is some countries if you use an alphanumeric SenderID because of restrictions applied by local carrier regulators.
In some countries, before using a SenderID you should register it.
Messages without a SenderID will not be delivered, thus setting a default SenderID is highly recommended
A receiver cannot respond back to an alphanumeric SenderID
For more information regarding the SenderID contact our Support team.
Callback##
Callback URL (or webhook) is used for updating client applications for SMS or Campaign (bulk SMS) state changes. You can provide callback URLs for message delivery status updates. There is also an option to choose if you need interim or final updates. The recommended values are to get only final status updates. Routee is using technology that enables very quick message delivery, so in most of the cases a final update will be enough.
Note that if Callback is enabled, all HTTP Responses from Routee API will be posted to these callback URLs!
Read more about Callback(s) here...
Quiet Hours##
By using this feature, you ensure your messages will be delivered with respect in quiet hours, some times enforced by local countries regulators, and common sense.
For example, by checking this option, sending a message to India will be delivered from 9am to 9pm standard India time only. This option is mainly intended for Promotional messages.
Enforce Transcoding##
By using this feature, you ensure your messages will be always transcoded (if possible) when the body of the message is in unicode and exceeds one part. If message parts are less than two then the message will be sent as unicode. Transcoding is available for Greek, French, Italian, Spanish and German locales.
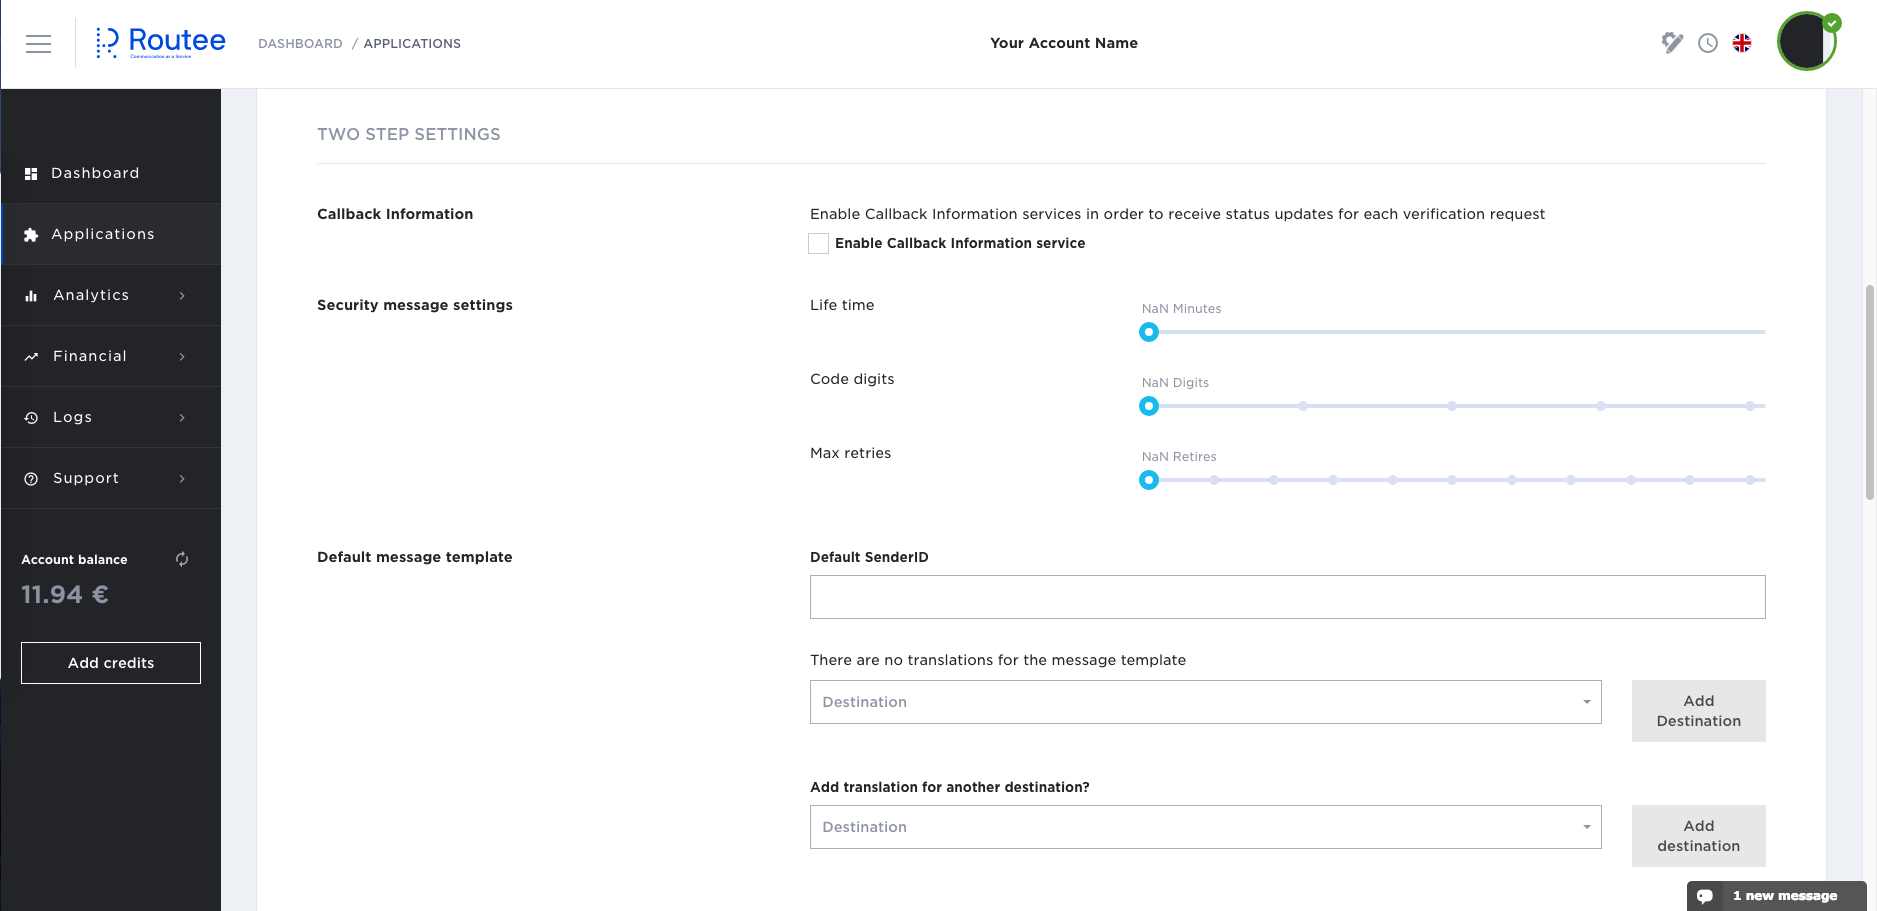
Two Factor Authentication for your applications or portals##
Two Factor Authentication is also known as two step verification. It is a method of confirming a user's claimed identity by utilizing a combination of two different components. In our case a code and a verified phone number.
You can use this service for any authentication in any portal or mobile application to ensure you provide maximum security just like many other services you are using.
It is easy and straightforward.
You can select the lifetime of each authentication code generated, the code complexity, the retries you may allow for each login and your senderID. You can also provide a set of translations for your messages applied.

Two step verification application settings
Two step verification example##
Assuming you are running a B2B Portal called "ABC" for your customers around the world (US/Mexico), you need to provide maximum security and make your site trusted.
Use Route API to set
- SenderID: ABC Portal
- Default Message template: Your PIN is @@pin. Welcome to ABC Portal!
- Spanish Message template: Su PIN es @@pin. ¡Bienvenido a ABC Portal!
- Max Retries:0
- Code Digits: 6
- Life Time: 2 minutes
Callback URL may be enabled for tracking message delivery status.
Check how you can enable Two Factor Authentication for your application. Read more...
IP Whitelisting
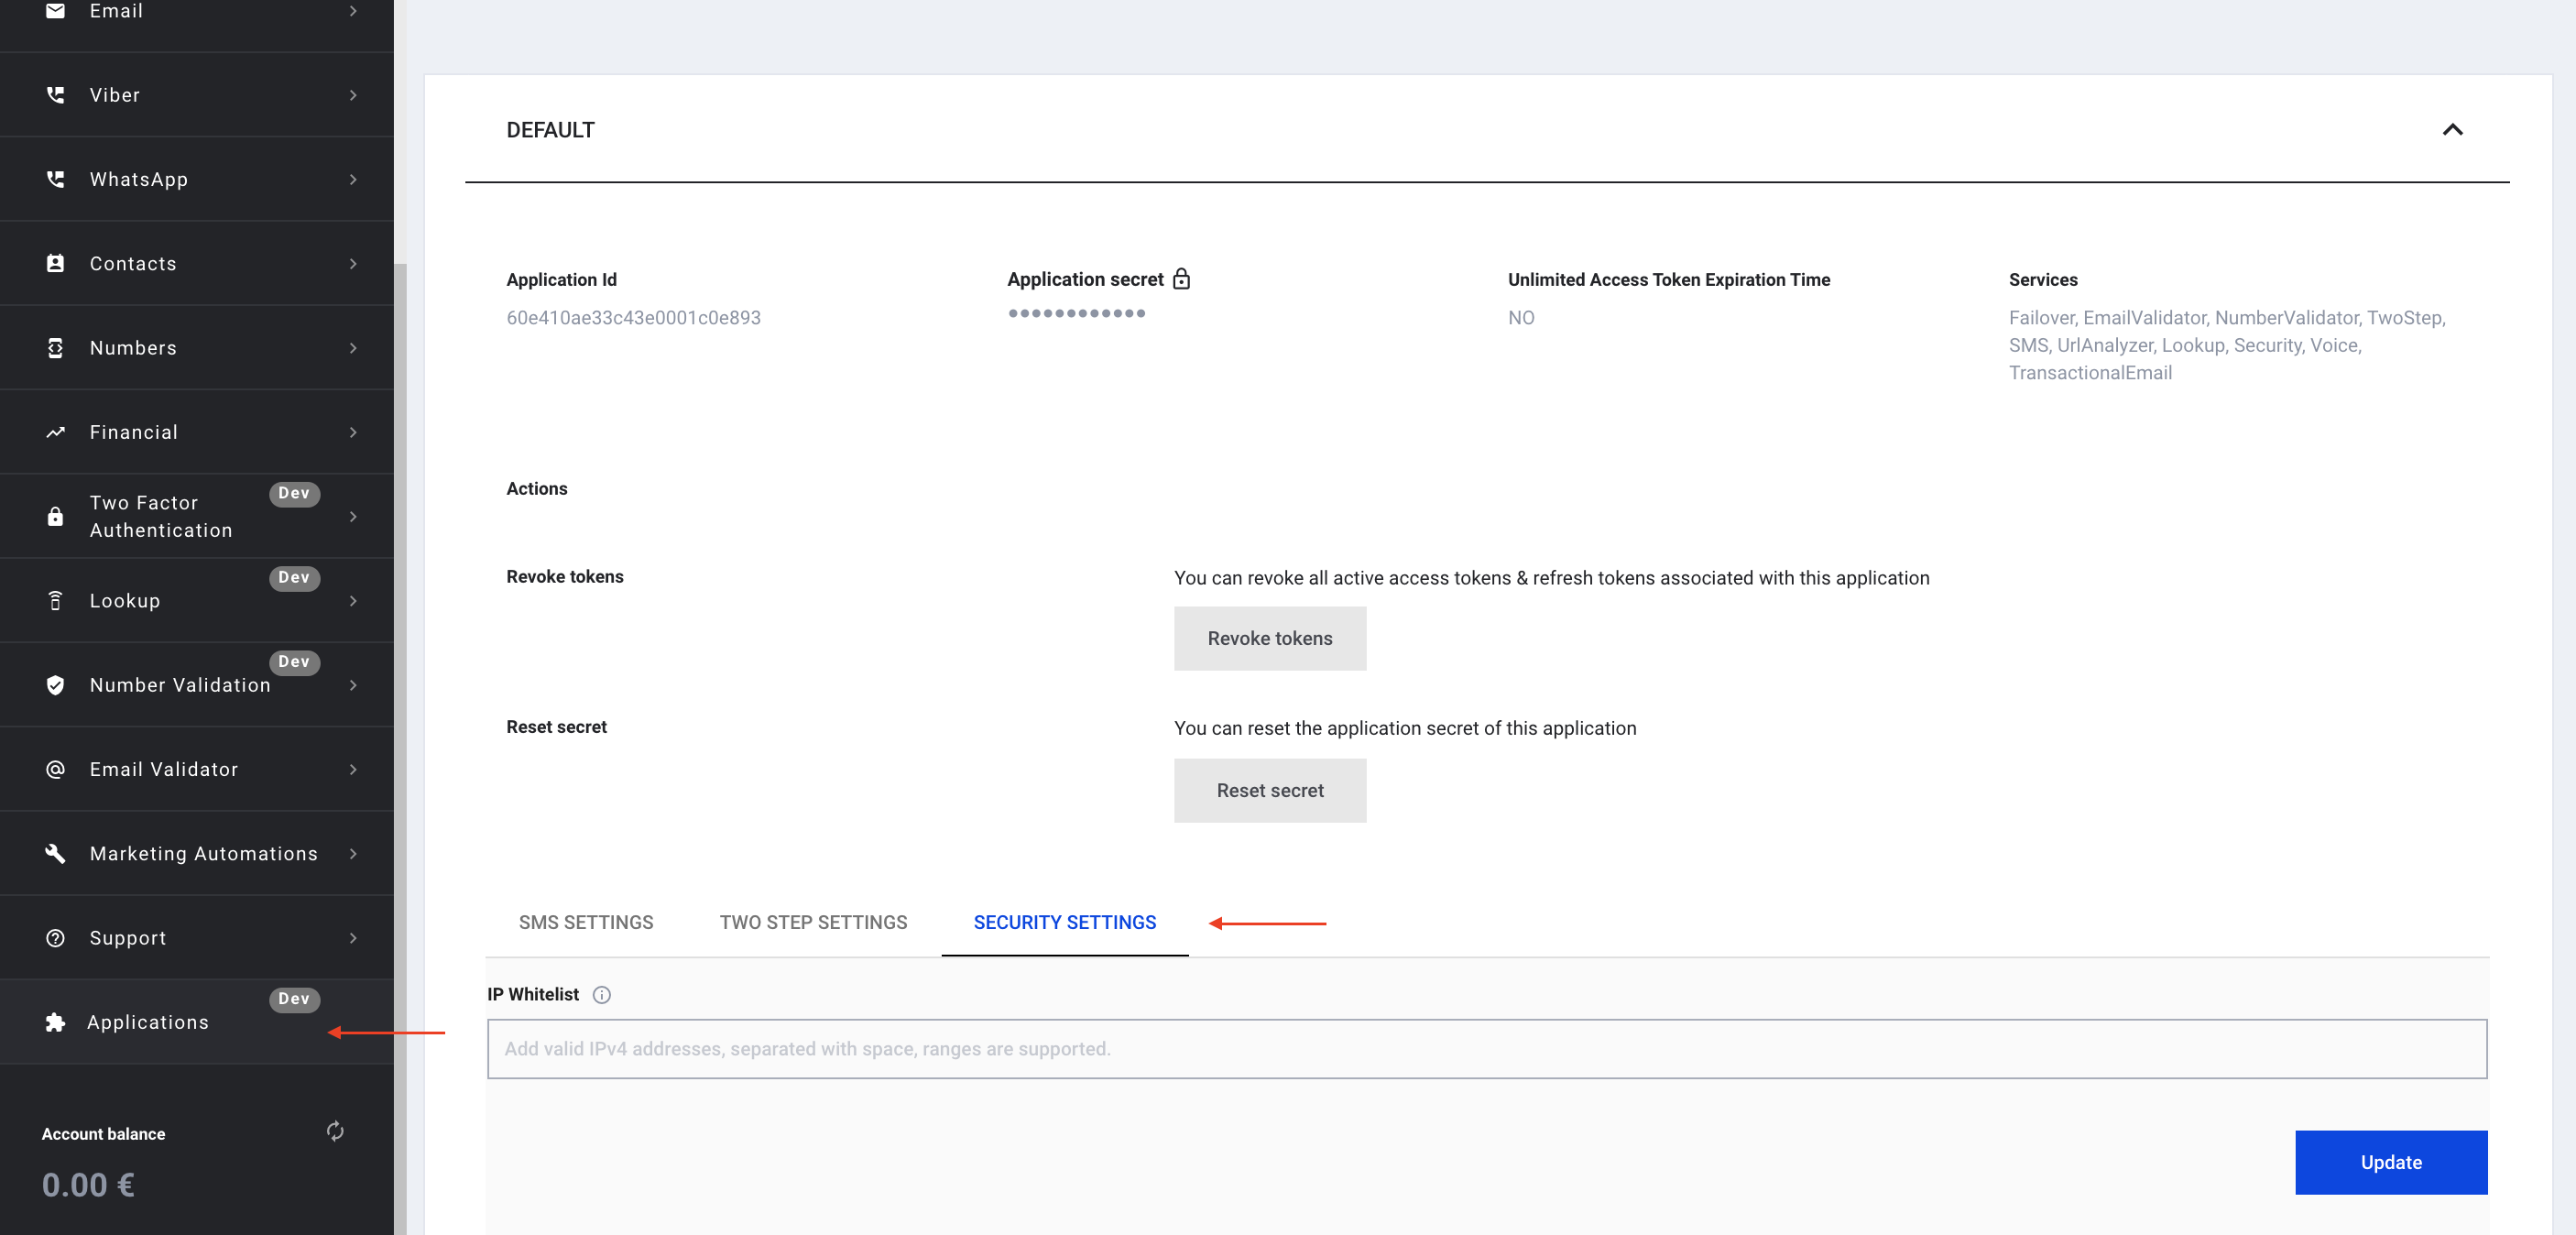
To have an advanced level of security for you application, you can set IP(s) that will be whitelisted to perform any activity through Routee.
To do that, please, navigate to the Applications tab. On the page find the Security settings tab.

Here, you can provide the IP or the list of IPs using which activity through Routee will be granted.
If the entered IP has a correct form, the IP will appear above the field and the “Update” button will be activated.

After clicking the “Update” button the provided IP(s) will be saved. Now, when accessing Routee from a not listed IP the use of the public API will be prohibited.
To manage IP whitelisting and disable this feature, click the ‘x’ next to the IP and click ‘Update’ button. IP whitelisting will be deactivated for the application.

Updated about 4 years ago
